Style rollout
Overview
RailClone objects create geometry based on a series of construction rules called Styles. RailClone Pro comes with an expanding library of over 280 styles including fences, railings, barriers, theatre seating, facades and much more.
Existing styles can be modified, and new styles created from scratch using the Style Editor. In addition, styles can be easily copied between RailClone objects for re-use.
To generate a renderable mesh, Styles may need several inputs. As a minimum, a single spline is required to create a path for the geometry, but more complex styles may require multiple items to be selected. In RailClone these are called Base Objects and the options to select and control them can be found in the rollout of the same name.
Some Styles may also have values editable directly from within 3DS Max, eliminating the need to open the style editor to make changes. These settings can be found under the Parameters Rollout.
Procedures
To use a predefined style
-
Create a new RailClone object by going to the Create Panel>Geometry>iToo Software and selecting RailClone. Click and drag in the viewport, an "RC" icon will appear to denote a new blank RailClone object.
-
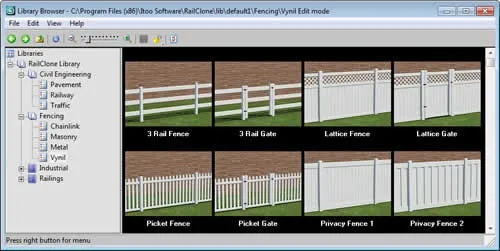
Go to the Modify Panel. To choose a preset go to the Style rollout and click on the box marked None to open the Library Browser.
-
Select a style and either double click, right click and select Use Item(s) or press the button marked Import Selected.
-
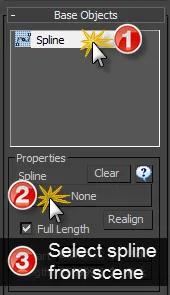
In the Base Objects rollout identify the spline in the scene you wish to use as a path by selecting the Base Object and clicking a spline from the scene. You should now have a finished RailClone object.
Updating a Style from the library that's used more than once
When you import a style from the library that has been used multiple times in the scene you can choose whether this should be applied to all objects or just the selected object, and also if local parameter values should be retained or replaced from the library. To do this:
-
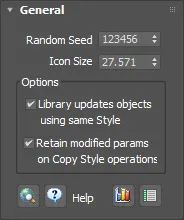
Select a RailClone object that uses a style loaded via the library and open the General rollout.
-
Turn on Library updates objects using same style if you'd like to update all the RailClone objects in the scene that use the same Library item. Turn this off if you'd like to update only the selected object.
-
Turn on Retain modified params on Copy Style operation if you'd like RailClone objects to retain their local Parameter settings. Turn this off if you'd like to update all parameter values from the defaults saved in the library item.
-
Go to the Style rollout and click on the box marked None to open the Library Browser.
-
Select the updated library style and either double click, right click and select Use Item(s) or press the button marked Import Selected.
To use a custom style
-
Create a new RailClone object as above.
-
Go to the Modify Panel. In the Style rollout click on the Open Style Editor button
.
-
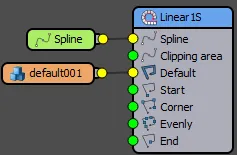
In the Style editor create a new Style. As a minimum you will require a Linear 1S Generator a Segment and a Spline object to create a working style(see image). Find out more about creating styles in the Style Editor reference andtutorials pages .
-
Close the Style Editor, Go to the Base Objects rollout, highlight and pick a spline in the scene you wish to use as a path.
To select the base objects used by the current style
-
With a RailClone object selected, Right click in the viewport and click Select RailClone Base Object.
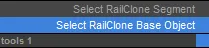
If a style only uses a single base object it will automatically be selected. If it uses multiple base objects, a dialog will open allowing you to choose the one to select.

To select a segment used by the current style
-
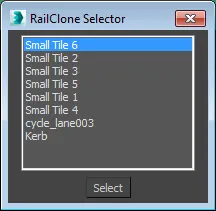
With a RailClone object selected, Right click in the viewport and click Select RailClone Segment.
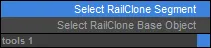
-
If a style only uses a single segment it will automatically be selected. If it uses multiple segments, a dialog will open allowing you to choose the one to select.
To smooth a jagged deformation
-
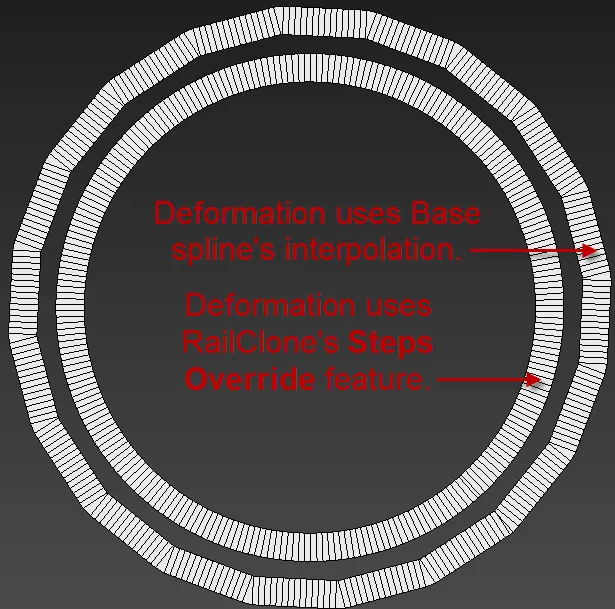
Sometimes you will find that the interpolation value of the spline being used as a base object is too low, causing the deformation of segments to look jagged. RailClone has a feature that enables the smoothing of splines by adding additional interpolation steps.
 info
infoMax has a limit of 100 interpolation steps but RailClone allows much higher values. This can be useful for smoothing splines that are physically very large in the scene but generate geometry that is seen close-up in the renders, for example an animation tracking along a road.info
-
In the Style setting increase the Curve Steps value until you get the desired results.
-
If nothing changes you may need to convert the spline from a line to a curve, this is often the case with certain spline primitives such as the Helix. Select the spline in the viewport and add an Edit Spline Modifier.
-
Go the spline sub object level, Ctrl+A to select all, right-click on the spline and change the type to Curve. The spline should now smooth in RailClone using the Curve Steps parameter as expected.
To copy a style from an existing RailClone object
- Select the RailClone object you wish to copy to.
- From the Style menu press the Copy Style From button .
- In the viewport click on the RailClone object with the style you wish to copy.
To copy a style to an existing RailClone Object
- Select the RailClone object with the style to be copied.
- From the Style rollout press the Copy Style To button .
- Select the target RailClone object.
Alternatively if you want to copy the style to more than one RailClone Object:
- From the Style rollout press the Copy To Multiple button .
- A selection window will open, select the RailClone objects you wish to apply the style to.
- Press the Copy To button.
The Copy To and Copy To Multiple tools allow you to propagate the style from a source into one or more destination RailClone objects. However, if you are using these features to update styles rather that replace them with new ones, you often need to retain the parameter values on individual objects. To do this, ensure that Retain modified params on Copy Style operations is selected in the General rollout.
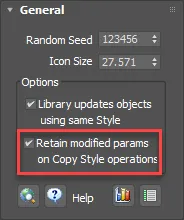
Alternatively if you'd like to overwrite all the parameter values with the settings in the Source style, turn this option off.
To link a style to another RailClone object
- Select the RailClone object you wish to become a slave
- From the Style menu click the Master Style picker
- In the viewport click on the RailClone object with the style you wish to copy. This will become the master and any change made to this style with propagate to its linked RailClone objects.
To use the materials assigned to the source geometry
- Ensure the source geometry has materials applied.
- With a RailClone object selected, go to the Style rollout and check Use Segment Material.
Interface
Style operations
Opens the Style Editor. Use it to define the segments and construction rules of a RailClone Style.
Copy the current style to another RailClone object.
Copy the current style to multiple RailClone objects, selecting them by name from a list.
Get the style from another RailClone object by picking it from the scene.
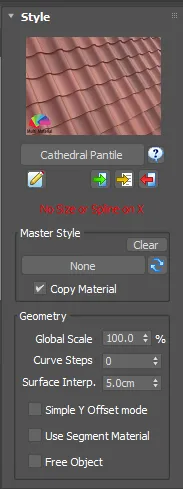
Master Style
Style linking enables you to link an RailClone object to another, so Style changes made on the Master are dynamically reproduced on the slave. The Update is broadcast when the Style Editor is closed, a Library Style is imported or by manually clicking the 'Update' button.
Parameter values are copied from the master as well, except those that have been modified by the user. In that way you can have several RailClone objects, all controlled from a single master style, but each with independent local settings. This mechanism works in same way than Library/Copy Style operations, and the behavior can be modified from "General" settings.
Copy Material
If this option is checked, the material is also copied from the master object to the slave.
Parameter values are copied from master as well, except those have been modified by the user. This mechanism works in same way than Library/Copy Style operations, and the behavior can be modified from "General" settings.
Geometry
The Geometry section contains a set of general parameters that affect the segments and base objects of the current RailClone style. These settings are independant of the Style used and are not affected if it is modified or a new one loaded.
Global Scale
Scale the full object by the specified value.
Curve Steps
By default, RailClone uses the Steps value of the splines used as reference. Use this parameter to modify the path's smoothness. It accepts values greater than 100, which is the limit in Max splines.
Surface Interp
This value can be adjusted to improve deformation when using a surface, especially when using very large splines. The value defines the distance between vertices created to conform the spline to the surface, decreasing this value will improve the accuracy of deformation. (Default = 5cm)
Simple Y Offset
Standard Y-Offset uses a sophisticated algorithm to compute Y-Offset paths, but in some cases does not generate the expected result. Simple Y-Offset provides an alternative algorithm that may resolve these problems. Enable this mode if you get distorted geometry when using standard Y-Offset.
Use Segment Material
When enabled, RailClone used the materials applied to the source geometry instead of those applied to the RailClone object. The source materials are only applied at render time, the viewport still uses the material assigned directly to the RailClone object.
For embedded Segments (those not linked to a scene's object), a copy of the latest material used by the object is stored internally. To modify the material of an "embedded" Segment, it's necessary to export it to a scene object from the Style Editor, and pick the material from it.
Currently, this feature is available only for V-Ray and Arnold Renderer or if you convert to standard geometry using RailClone Tools. Other render engines can add support using our updated API.
Free Object
When enabled, RailClone ignores the spline's position but is still deformed by its shape. This mode allow you to move the RailClone geometry freely in the scene, or to create instanced objects without needing to clone and relocate multiple copies of the base spline.