Paths
Overview

The Base Objects rollout lists all the inputs that must be selected from the scene to generate the current style. For example a single L1S generator will require a single spline, a single A2S generator takes two splines, and both can optionally use an additional spline as a clipping path.
RailClone use objects from the Max scene as reference, in the example above a spline determines that path of a cornice. These objects are added in Style Editor , but their properties are defined in the Base Objects. This lets you to easily adjust the reference objects, without the need to open the Style Editor each time.
The list is updated automatically when adding, deleting or renaming base objects in the Style Editor.
Procedures
To create a new base object
-
Open the Style Editor from the Styles Rollout
-
Drag a new Spline node from the items list to the construction View. The Base Objects list will be updated to show the new spline.
-
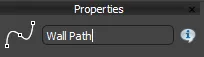
Change the name of the spline input from the Properties Editor. The name will also update in the Base Objects list to reflect the changes.
-
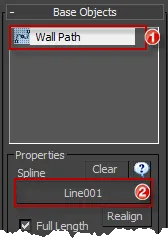
To pick a spline from the scene to use as a base object, click the name of the input you wish to use from list in the Base Objects rollout, got to Properties>Spline and pick a spline from the scene. Alternatively, you can assign the spline from the node's properties, in the Style Editor.
To rename an existing base object
-
Open the Style Editor from the Styles Rollout
-
Select the Spline node you wish to rename.
-
Go to the Properties Editor>Name and enter the new name for the spline.
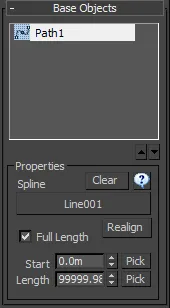
To control the starting point and length of the Railclone object along a spline
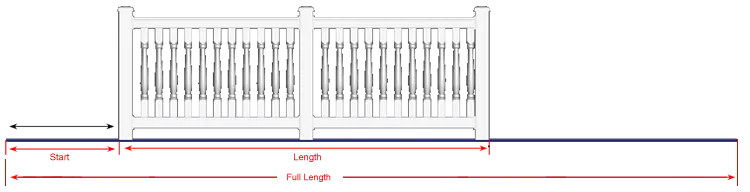
If full length is switched off, the area of spline to be used can be controlled with the start and length values.
- From the Base Objects rollout select the spline you wish to change
- Turn off Full Length. The length of the spline to be used by the generator is now governed by the start and length controls
- Adjust the Startdroperty either by entering the value manually or selecting the Pick button to the right of the Start value and selecting a start point by clicking in the scene. The geometry will move along the path the designated amount in scene units from the first vertex.
- Adjust the Length this is measured from the start point in scene units, or alternatively select a point from the scene using the Pick button to right of the Length spinner.
To add a tooltip to a base object
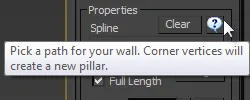
If you are sharing RailClone objects with other users it is helpful to provide tooltips to explain how to use the different base objects used in the style. To create your own tooltips, follow these steps.
- Open the style editor and click a spline node you wish to provide help for.
- From the Properties editor, enter the tooltip text in the Description field.
- To see this guidance in 3DS Max, select the item from the Base Object lists and click or hover over the help icon to read how to use it.
To move the Railclone geometry so that it lines up with the spline
- Go to the Base Objects rollout and click Realign to move the Railclone geometry back into its original aligment with the spline.
Interface
Currently, RailClone only supports the use of splines and Surfaces as base objects, however other types of elements will be added in the future.
Interface components
Move up/down selected item
Changes the display order of the currently selected base object.
Spline
Assigns the spline object by picking it from the Max scene.
Realign
Lets you realign the RailClone object with the selected spline. Use this option if you accidentaly move the object from its original position.
Full Length
Defines whether to use the full length of the spline, or only a portion of it. If you Use Full Length is turned off, use the Start/Length parameters to define the spline's extension, or the pick button to define the Start/End positions visually by clicking on the scene.