Style Editor overview
Overview

RailClone is designed to help artists create sophisticated reusable parametric models using an easy-to-understand node based editor. RailClone combines, deforms and distributes meshes known as Segments along one or more Base Reference splines according to construction rules defined using Generators and Operators. The interplay of these three parts is called a Style and is created using the Style Editor.
The Style Editor Interface
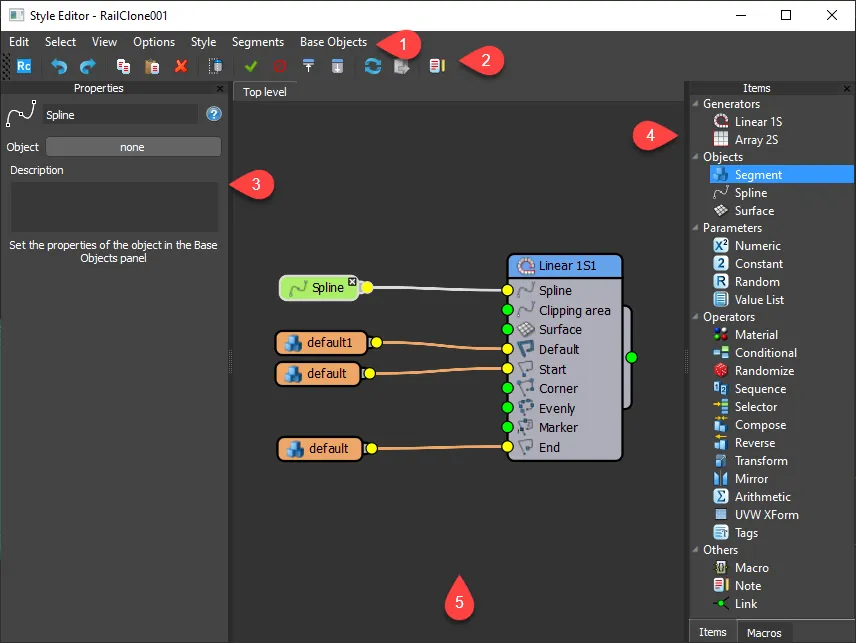
The Style Editor window is divided into 5 sections:
Sections
1. The Menu Bar
Most of the functions found in the Menu Bar are accessed more easily from the toolbar or right-click menu, but a few features, such as the ability to save and restore scene views, and the Style Editor Preferences are only found here.
2. The Tool Bar
The Tool Bar provides buttons for regularly used functions. Float the toolbar by clicking and dragging in the hatched area to the left.

3. The Properties Editor
The Properties Editor allows you to view and alter the parameters of the selected node. The effects will be updated in real-time in the 3DS Max viewport.
4. The Items Panel
The Items Panel lists the node types available for use when designing a new style. To add a new item, simply drag it from the item list to the Construction View.
5. The Construction View
The Construction View is used to create Style rule sets by wiring together generators, objects, operators, and parameters. Once a node is created in the construction view, its variables are accessible in the Property Editor
Nodes
Styles are created by wiring together different nodes. In order to function, a style must contain at least one Generator, Segment and Base Object, but many more types are available. Though many nodes have sophisticated parameters, the interface in the Construction View is simple and consistent.
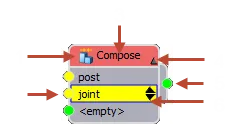
The components that can be found on a node are as follows:
- Icon indicating the type of node.
- Input sockets.
- Node name. This can be changed in the properties' editor.
- Collapse or expand sockets.
- Output sockets.
- Change order up/down. Some nodes allow multiple inputs, if that's the case these arrows change the order in which the inputs are processed.
Wire Colours
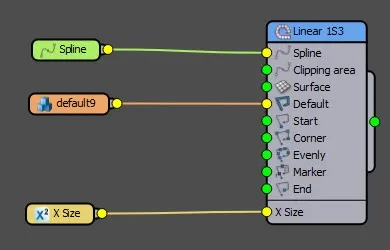
To make graphs easier to read, wires are coloured according to the type of data, as follows:
Green: splines or Surfaces
Orange: geometry, including segments, and all operators excluding Arithmetic
Yellow: numeric, including Parameters and Attributes.
Procedures
To add a new node to the Construction view
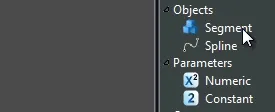
Adding a new node
- Identify the node type in the Items list on the right hand side of the style editor, select and drag it into the Construction View.
Adding an existing wire node
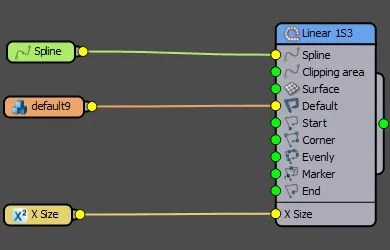
- Nodes can be added to an existing wire simply by dragging a new operator from the list and releasing the mouse once the wire is highlighted. Alternatively, you can add a node to a wire by right-clicking and selecting
To rename a node
- Select the node in the Construction View. In the Properties Editor Type a new value in the name field.
To connect nodes
Connecting nodes
Either
- Click on the input socket of a node, drag the mouse (you'll see a wire following the mouse pointer) and release over the output node of another
Or
- Click on the output socket of a node, drag the mouse and release over the input node of another.
A single output slot can be connected to multiple inputs.
To connect multiple nodes
Multiple nodes can be attached to Compose, Sequence, Random, and Selector operators. To do this:
- Select the nodes you wish to attach.
- Drag any of the nodes outputs to the operator's input.
To disconnect nodes
- Click on the output slot of a node and drag to an empty area of the Construction View. Any nodes connected to the slot will be released.
To collapse and expand nodes
Collapsing and expanding nodes
Either
- To collapse a node, click on the small upward facing arrow on the right of the title bar
- Once a node is collapsed, to expand it again click on the small downward facing arrow on the right of the title bar
Or
- Use the keyboard shortcut CTRL+X to expand and CTRL+L to collapse
Or
- Click on the Expand () or Collapse () node buttons from the toolbar.
To automatically select a node's children
Either
-
Hold down Alt+Click in any node to automatically select its children.
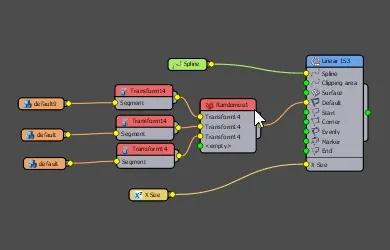
Or
- Select a node and Right-Click then pick Select Children
Auto-Renaming
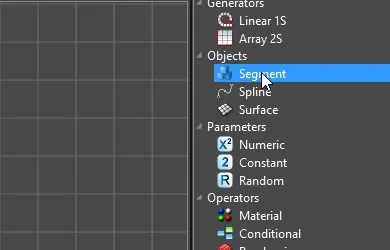
All nodes added to the graph now receive a unique name. This not only helps to discriminate between nodes, but is also useful when using expressions with nested generators as it allows you to reference the properties of a specific generator in a chain.
Select Unused Node
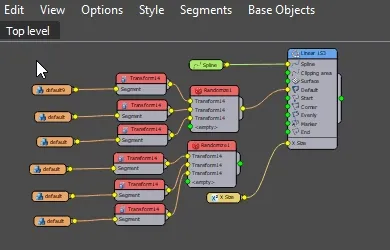
Clean up your graphs using the Select Unused option.
- Go to the Edit menu in the Style Editor. Click Select Unusued, iny nodes that do not eventually terminate at a generator will be selected.
To swap the connections for two nodes
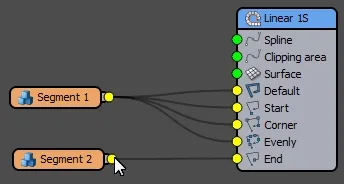
- Drag the output of a node 1 to the output of node 2. Their connections will swap.
To export a node's parameters
Exposing property slots
Any numerical parameter can be exposed as an input slot and wired to Parameter Nodes.
- Right-click on the node, select node>Export> and choose the parameter to be exposed.
- The exposed property will be added to the bottom of the list of input slots.
To clear all exported parameters
- Right-click on the node and select Export Parameters > Clear All.
To export a node's attributes
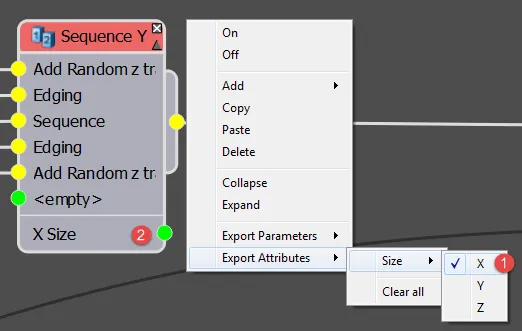
The size of a segment can be exported from any node. To do this:
- Right-click on a node, select Export Attribute and choose the parameter to be exported.
- The exposed attributes will be added to the bottom of the list of output slots.
To clear all exported Attributes
- Right-click on the node and select Export Attributes> Clear All.
To delete a node and heal wires
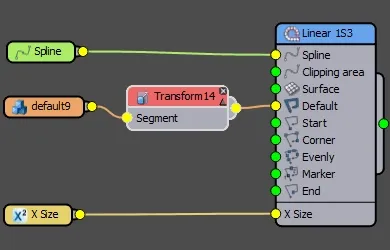
- Select the node and press the delete key. The wire will be automatically healed to maintain connection with the next node in the chain.
To change the order of input slots
Changing input order
- Click on the name of the input slot you wish to move
- Click on the up or down arrows to the right of the slot name to change the order
This is possible on the Sequence. Randomize. Sequence and Arithmetic nodes only
To snap nodes to the grid
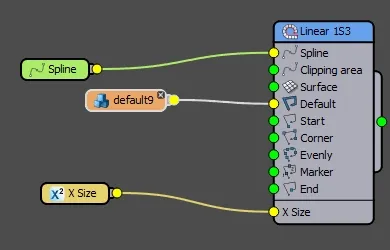
- Go to Options > Grid Setup.
- Enable View Grid to see the grid in the style editor.
- Enable Snap to Grid to force nodes to snap to the grid.
- Change the size of the grid using the Spacing droperty.
To copy nodes
Either
- Click on Copy from the toolbar or right-click the selection and pick Copy.
- Paste the node by clicking Paste in the toolbar or right-click anywhere in the Construction View and select Paste.
or
- Select the nodes you wish to copy
- Hold down shift while click dragging the selected nodes.
To Undo and Redo the previous action
- Click Undo from the toolbar or right-click and select Undo.
- Click Redo from the toolbar or right-click and select Redo.
To update a Segment from the source geometry
Do one of the following.
- Click Reload Segments from the toolbar.
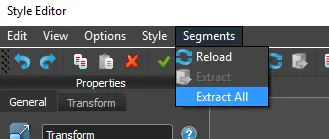
- Go to Menu>Segments>Reload.
To extract a Segment from RailClone
- Select the segment node you wish to extract.
- Click the Extract Segment To A New Object button from the toolbar or go to Segments>Extract from the menu.
- The segment will be created in the scene at its original coordinates.
Or
-
To extract all segments go to Segments > Extract All.
To disable nodes
Either
- Toggle on and off by clicking on the small black cross in the top right hand corner of any node.
Or
- Turn on and off the selected node using the Enable button ( ) or Disable button () from the toolbar.
To add a description to a style
-
From the Style dropdown menu at the top of the style editor, click
 top open the Style Description
window.
 -
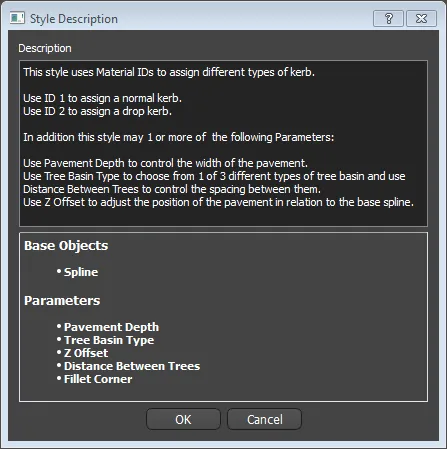
Enter a description, normally this will contain information for new users about how to use the style. You can also see a list of all the base object and parameters used.
-
Click OK.
The style description can also be set using Maxscript. This can be useful where you need to create a description for multiple, similar styles.
To set the style description for a single selected object use:
$.railclone.setStyleDesc("my style")
To set the style description for multiple selected objects use:
for obj in selection do (obj.railclone.setStyleDesc("my style") )
To access the style description use:
$.railclone.getStyleDesc()
To view a style's description
-
In the modify panel, open the Style rollout and click
-
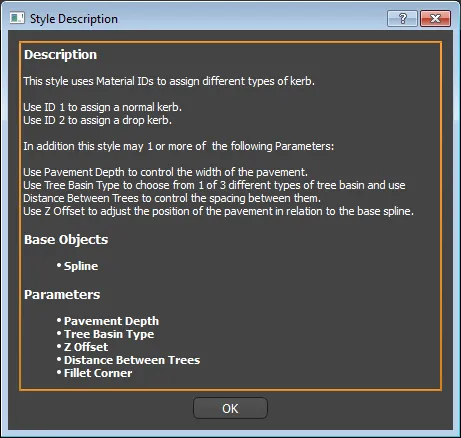
A dialog opens containing the style's description, including the base objects and parameters used.
To password protect a style
- Open the style editor.
- Go to Style > Protect by Password. Enter a password. Be sure to remember it, it cannot be reset once it has been set.
- Click OK. The next time the style editor is opened, it will prompt for a password.
To remove a password, open the style editor and enter the password. Go to Style > Protext by Password. Delete the existing text and leave the field blank. Then click OK.
To add geometry or splines selected in the scene to the graph
- With the objects selected, right click anywhere in the Graph Editor view.
- Select Import Scene Selection. A new segments or spline node will be created for each selected object.
To hide wires except for those connected to the selected node
Either
- Go to the View menu and select Hide Wires.
or
- Use the keyboard shortcut CTRL+W to toggle the mode on and off.
Style Editor Preferences
This menu allows you to control the default behaviour of the style editor, to open it go to Options>Preferences.
Show warning Dialogs enables you to toggle on or off the warning dialogs displayed by RailClone when you exceed its segment and polygon counts
Rename Segment when assign object then enabled, segments are renamed automatically to match the name of the source. If disabled, the existing name of the Segment is retained.
Rename Segment when reload then enabled. clicking the Reload Segment button will also rename the nodes. When disabled the existing names are retained.
Change Default Font enable this option to change the font used in the style editor. To select a new font, click on the font picker button denoted by the ellipsis below.
Wires > Curvature Allows you to change the "curviness" of wires, 0 makes wires linear.
Wires > Thin Wire enable this option to make the wires thinner.
Limit Zoom To Allows you to prevent zooming on the graph canvas above a set threshold.
Rename Segments When Reloaded. then on a segment's name will be overwritten with the mesh name when using the reload function. If off, a segment's name is retained when using reload, useful if you've manually renamed your nodes.
Limit Zoom to. Allows you to set the maximum level of zoom possible when navigating the construction view.
Toolbar Reference
Select the active RailClone object.
Undo the previous step.
Redo the previous undo operation.
Copy the selected node or nodes to the clipboard.
Paste.he contents of the clipboard to the Construction View.
Delete the selected nodes.
Window/Crossing changes selection modes. In Window mode, only nodes completely inside the selection rectangle are picked, in Crossing mode, objects partially inside the selection rectangle are picked.
The following options are used when there is a Segment node selected:
Expand the selected node (CTRL+X).
Collapse the selected node (CTRL+L).
Enable the selected node (CTRL+E).
Disable The selected node CTRL+D).
Update all segments from the source objects. It works like applying the replace button for each segment with its object. If the source object was deleted from the scene this has no effect.
Create a new object in the scene by extracting the geometry from the selected Segment. Use this option if you have deleted the source object of a Segment and want to restore it. The object is created at its original coordinates. RailClone uses it as the new source object, discarding references to the old one.
Types of Node
RailClone includes several classes of nodes:
Generators
Are the responsible for generating the geometry, according to a list of Segments, Base Objects and construction rules. A unique RailClone object can use multiple generators, allowing the creation of complex parametric objects.
Each type of generator is specialized in one task, for example linear or array objects. Click to see the description of each one of them:
Objects
This category includes elements which reference other objects in the Max scene. There are two categories: Segments and Base Objects.
Segment
Segments are the basic mesh pieces used by RailClone to generate the object. See Segments reference for more information.
Base Object Spline
A base object is any external object used as reference to distribute the segments, but that is not part of the geometry of RailClone. For example to define the path of a fence, we use a Spline.
Unlike other nodes, the properties of a base object are not defined in the Style Editor, but in the Path Base Objects rollout. For each base object in the style editor, there is a corresponding item in this list.

Currently, Splines are the only type of base object included in RailClone, but other elements will be added in the future.
Parameters
Parameters can be wired to exposed properties in other nodes. There are two types:
- Constant is a single value that can be edited only from within the Style Editor.
- Numeric is adjustable both from within the Style Editor and also the parameters rollout in the Max Plugin.
See the Parameter reference for more information and procedures.
Operators
Operators are used to modify the behaviour and properties of Segments. See Operators reference for details.
Others
Includes other types of nodes that don't fit in the above categories:

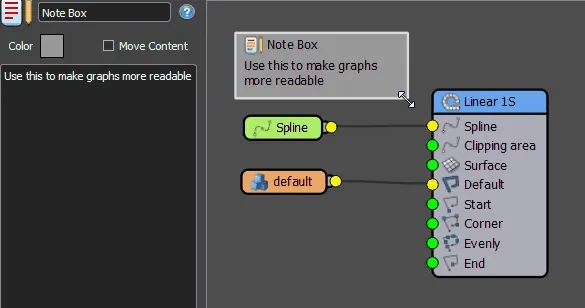
Note
Use it to add a generic text note or a group the style editor. Text can be edited in the Properties panel and the notebox can be coloured and resized by clicking and dragging on the boundary.Turn on Move Contents to ensure that nodes enclosed by the box are moved together,
