How to use Clipping Splines
Clipping allows you to use a closed spline to slice the geometry of a RailClone object. RailClone's clipping is considerably more efficient than using 3DS Max's boolean operations as it only computes segments that are intersected by the clipping spline, and it is able to maintain instancing for non-sliced segments. To use clipping splines there are 5 rules that are helpful to avoid encountering problems.
Rule 1. Clipping splines must be closed, open splines have no effect.
Rule 2. Sliced segments are no longer instanced, however other segments retain all the benefits of instanced geometry. This can be a consideration if your spline is slicing a large number of very high polygon segments as you can end up with high polygon counts if you're not careful.
Rule 3. The Projection._axis relates to the orientation (bounding box) of the RailClone object - not the
spline's or world's axes.
Rule 4. Clipping splines cannot be used simultaneously as include and exclude areas in the same style. To do this you need to add two different Spline nodes and pick the same spline twice.
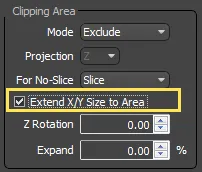
Rule 5. When using Extend X/Y Size to area > Generator > Limit by Material ID is disabled.
Include and Exclude geometry
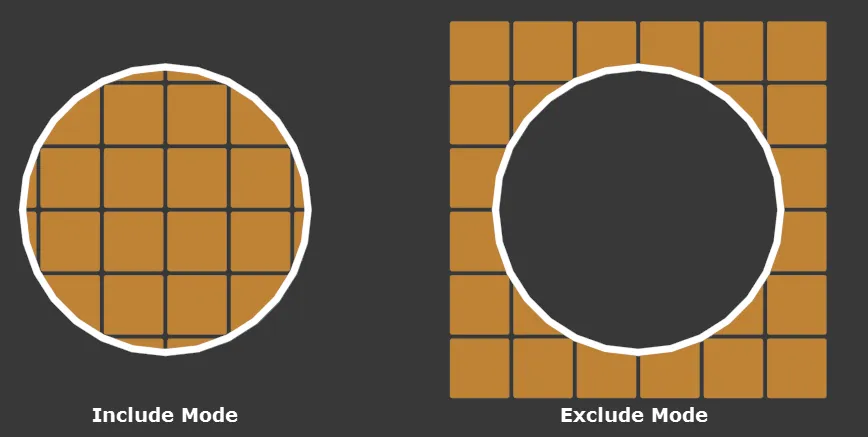
In its simplest Mode, clipping splines allow you to use a boolean operation to include or exclude parts of the array. In Include node, segments that fall entirely outside the clipping area are removed, segments that are entirely inside the clipping area are retained, and any segment that the spline crosses will be sliced and the section outside is removed.
The opposite is true if you set the clipping operation to Exclude node. When this is selected,
segments that falls entirely outside the clipping area are retained, segments that are entirely inside the clipping area are removed, and any segment that the spline crosses will be sliced and the area inside is removed.
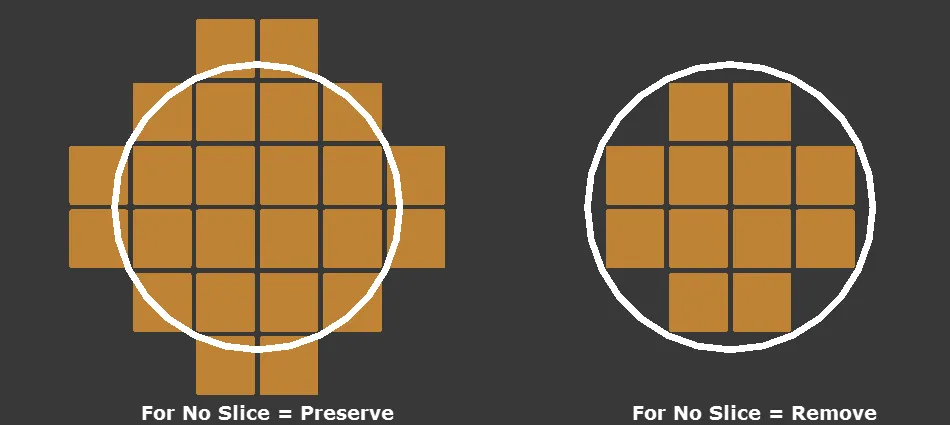
These two modes can also be controlled further using the Segment's Properties > Default > Slice toggle in conjunction with the generator's For No-Slice options.
 The Segment's Slice On/Off option box
For each segment you can choose to turn on or off the ability to slice the geometry.
 The Generator's For No Slice options
Then, when a segment with slice turned off intersects with a clipping spline you have 3 options. The segment can either be removed completely, preserved, or the slice toggle can be overridden in which case the geometry will be sliced irrespective of the segment's settings. The diagram below illustrate Preserve and Remove node on segments with Slice turned Off.
Exercise: Using Clipping to Include geometry
- Open the file called
chapter_6_deck_start.maxfrom the downloads for this guide. - Select the rc_decking RailClone object. This is a simple style that uses a couple of board segments to create a wooden deck driven by 2 splines to define the size on the X/Y axis. There are also two additional generators that are currently turned off. These will be used in the following exercises, you can ignore them for the minute.
- Drag a new Spline object from the items list to the construction view. Wire this the Generator's Clipping Area input.
- Select the new Spline node, go to Properties and click to select a spline from the scene. Pick circle_clipping_spline, you'll find it's under the decking.
- Select the generator and go to the Properties.
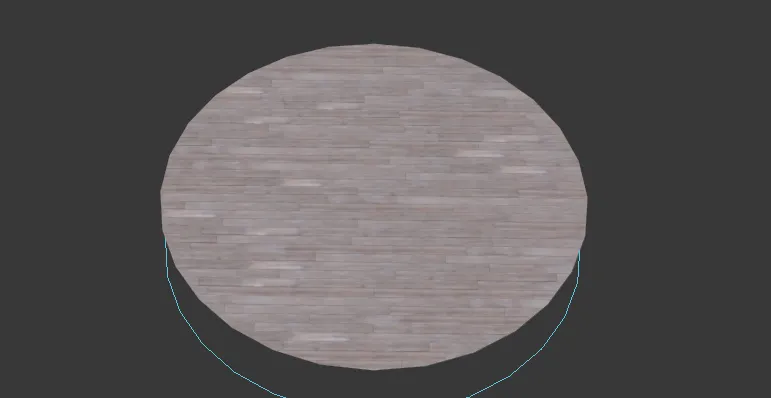
- In the General tab you will find the Clipping settings. Change the mode to Include (if it isn't already) and the deck will only appear inside the circular spline.
Exercise: Using Clipping to Exclude Geometry
To set the style up to use the spline to cut through the geometry and leave the outside area intact you would follow exactly the same procedure as described above except in the final step
change the mode to Exclude, and you'll see that the circular splines cuts a hole through the deck!

Exercise: Re-use the clipping spline
Clipping splines in RailClone are just like any other object, they can be easily re-used in various ways to create sophisticated interrelated rules-sets.
You can use a clipping spline with multiple generators as long as the same mode is used for each generator - it isn't currently possible to use the same spline node to exclude geometry in one generator, and include it in another. If you need to do this you will need to create two spline nodes - one for excludes and another for includes. These can however both use the same spline as a source object.
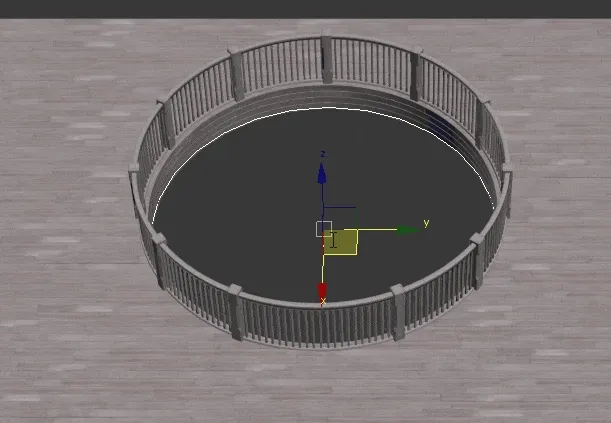
It's also possible to reuse a clipping spline to define the X or Y axis of another generator. This is extremely useful if you need to create a border around a clipped area. In the following example we'll illustrate how the decking style uses a Second A2S generator to create a vertical edging, and an L1S generator to add a balustrade around the perimeter of the clipped area. Both of these use the same spline node, so if you edit the path's position or shape - all three generators will update automatically.
-
Starting from the end of the previous exercise, re-open the Style Editor. In the scene are two other generators, one for the edging and another for the balustrade.
-
Turn on the generator called Decking Side by clicking on the X in the top right hand corner of the node

-
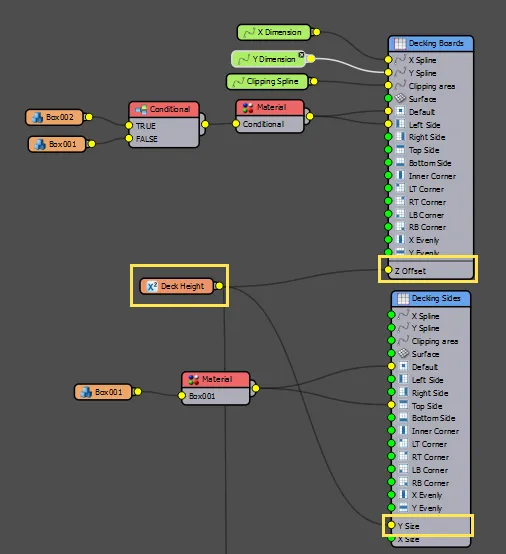
Note that this Generator's Y Size and the Decking Generator's Z offset are both wired to the same Numeric node. This means that as you raise the decking object, the height of the sides will increase to fill in the space between the deck and the floor.
-
To set the path for the Generator's X axis, wire the clipping spline the X Spline input.
-
Now we'll do the same thing for the balustrades. Turn on the 3rd generator and wire the Clipping spline to the generator's spline input.
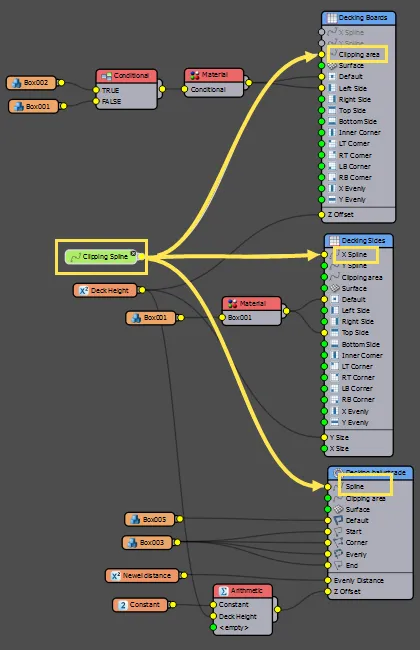
These three generators are now driven by the same two inputs. If you move or reshape the spline or adjust the Deck Height parameter, you'll see that all the generators are updated.
Changing Projection Axis
In the previous example, the clipping spline is projected along the RailClone object's local Z axis. This is the default mode, but it is also possible to change the axis to project on the X or Y axes.
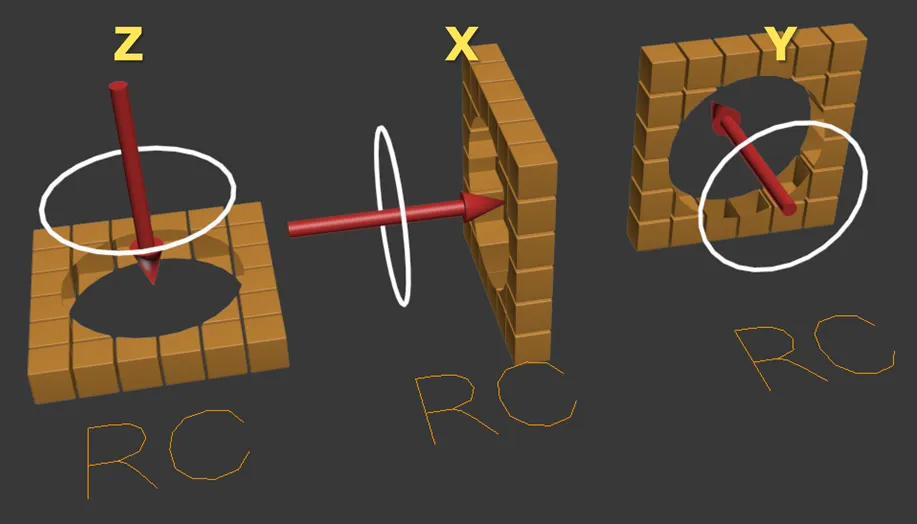
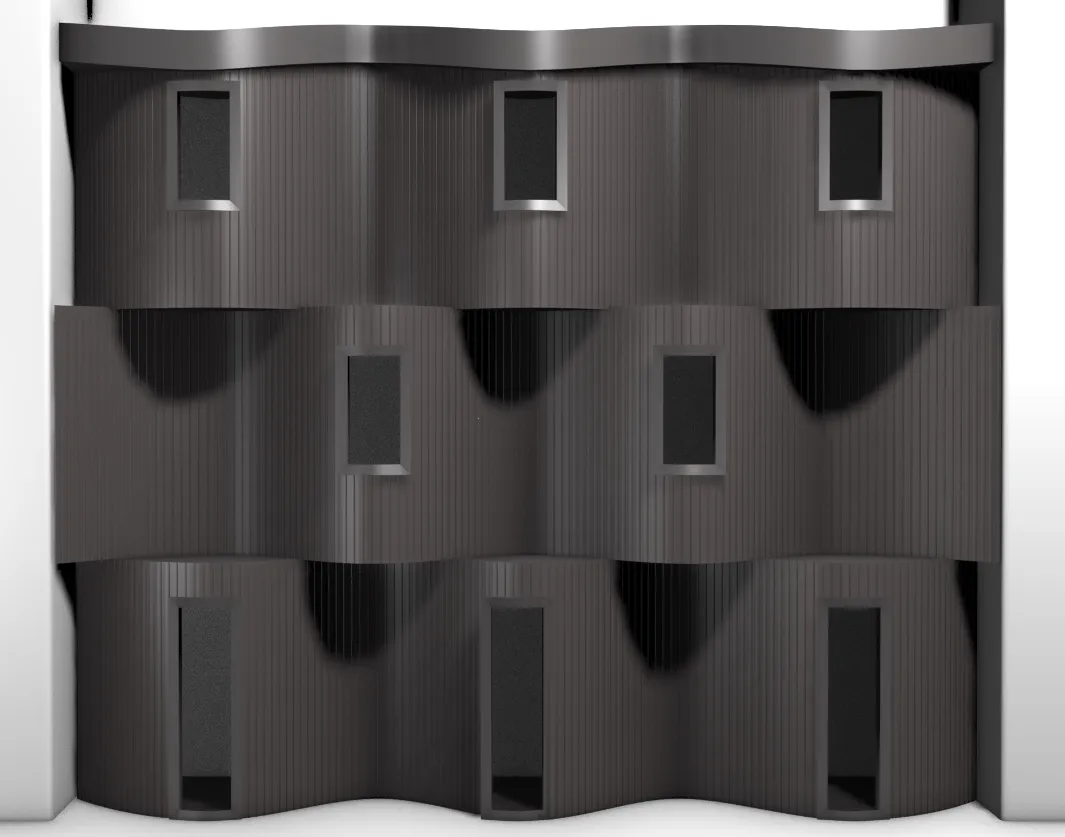
This is ideal when you need to clip a vertical style like a wall or façade.In the following example we'll change the projection axis to clip windows from a cladding style.
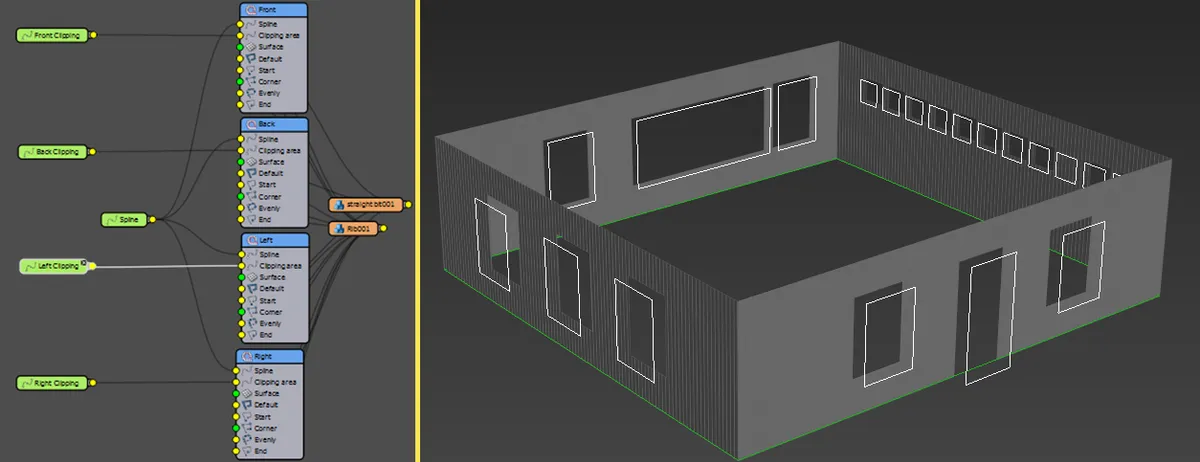
Exercise: Clipping holes in a Vertical Style
-
Open
chapter_6_clipping_axis_start.maxfrom the downloads for this guide. -
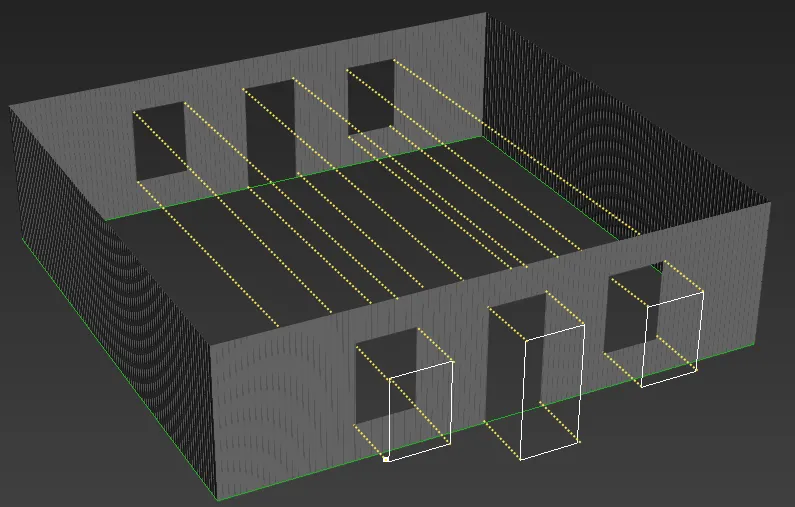
In this scene you'll find a vertically clad wall. In front of this is a spline consisting of 8 rectangles that describe the size and location of window apertures. We can use this spline to cut holes through the cladding for the windows (which would be added as a separate object).
-
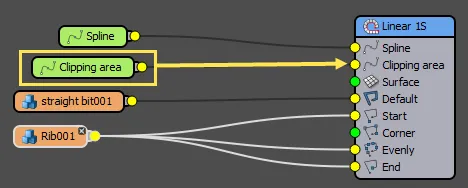
Select the rc_cladding RailClone object and open the Style Editor. Create a new Spline node, go to the Properties Panel and click to pick window spline from the scene.
-
Wire the new spline node to the generator's Clipping Area input.
-
Nothing will happen, this is because the clipping operation is set to project the spline on the RailClone object's Z axis. To change this, select the Generator and go to the Properties Panel. In the Clipping Area group, change the Projection axis to Y.
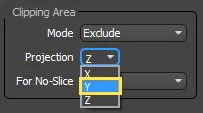
-
The clipping spline is now correctly cutting through the cladding.
You can choose from any of the X,Y or Z axis to best match the orientation of your RailClone object, however you can only project on a single axis per generator and the clipping operation will go through the model, removing geometry from both sides.
If you have an object that needs to be clipped from multiple angles you will need to split the style into different generators or duplicate the RailClone object. For example. a four sided building might use a separate generator for each façade, each with its own clipping spline. This will allow you to have different apertures on each aspect of the building.
Using clipping splines to define the X/Y Area
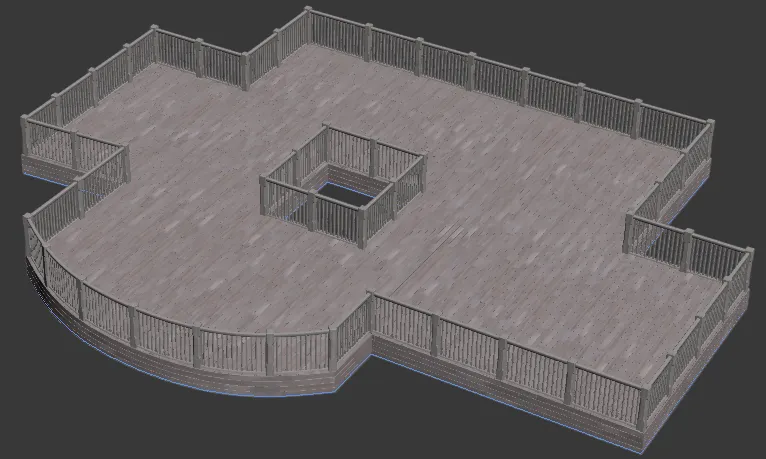
Clipping splines can be used to automatically set the dimensions of a two-dimensional array. This is the fastest way to create styles where you need to fill a spline area. Using this mode you do not need to use X/Y splines or enter a length and width value manually, making it ideal when using RailClone as a floor, ceiling or vertical cladding generator. In the next exercise we'll adapt the decking style from the beginning of this chapter to extract its size from a perimeter spline.
Exercise: Use X/Y Size Mode to create decking
-
Continue from the
chapter_6_deck_start.maxfile used in the exercise above. -
Select the RailClone object and open the Style Editor. Delete the existing spline nodes attached to the X Spline and Y Spline inputs of the Decking generator - we won't be needing them anymore. At this point the geometry for the deck will disappear as there is nothing to determine the size of the array.
-
Select the Decking generator and go to the properties panel. Turn on Extend X/Y Size to Area. The deck will now re-appear inside the existing clipping spline.
-
Let's test the style on a different spline. Close the Style Editor, then from the Modify Panel go to the Base Objects rollout and select Clipping Spline. Click on the spline picker and select deck_plan_spline from the scene. The decking will update, automatically creating an array of the correct size and clipping the geometry to match the plan.
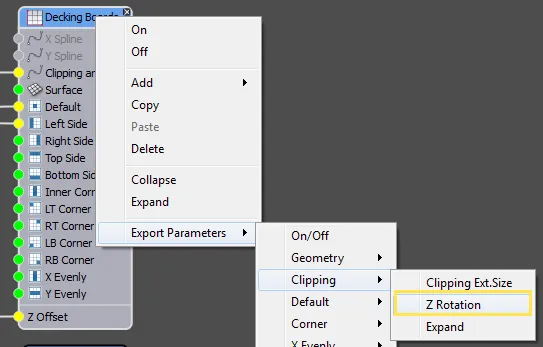
Exercise: using the Rotate XY Rotate
When Extend X/Y Size to Area new Z Rotate parameter becomes available. This allows you to rotate the entire array inside the spline. As the generator rotates, the size is automatically updated to ensure that the entire spline is covered by the array and the geometry is clipped to fit with the new orientation. In this exercise we'll add a numeric node to this property so that it can be easily edited from the Modify panel.
-
Continuing from the previous exercise, right-click on the Decking generator and Export Clipping > Z Rotation
-
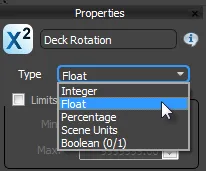
Wire a new Numeric node to the exposed Z Rotation input. Change the type to Float and rename it Deck Rotation .
-
Now close the Style Editor. You can now edit the angle of the boards by going to the Parameters rollout and entering a new value for the Deck Rotation property.
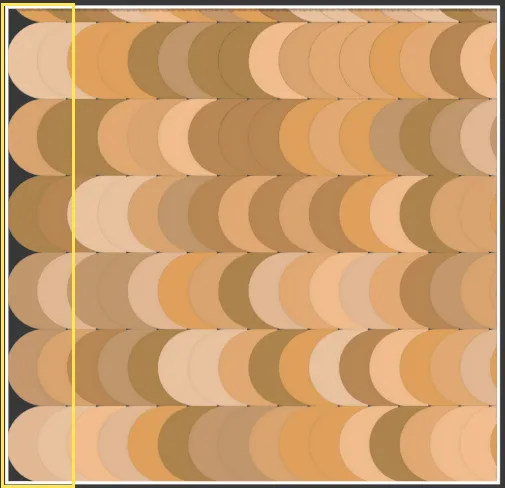
Expanding areas - due to padding values or that shapes of certain segment's
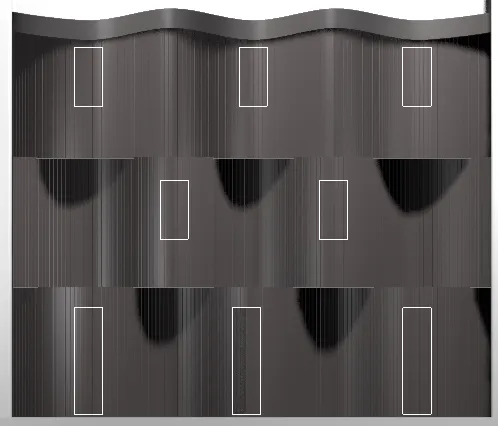
A second parameter called Expand also becomes available when using Extend X/Y Size to Area. This allows you to adjust the automatically generated size of the array and is useful for situations where segments are missing or gaps appear around the perimeter of the spline. This can happen when using padding and transform to adjust the positioning of segments, or if the side of the geometry being used is not parallel with the spline. For example, the tiling style shown in the diagram below features concave and convex areas that means it does not slice well on the left side of the array.
To fix this:
-
Open the file called
chapter_6_clipping_extend_start.maxfrom the downloads for this guide. -
Select the tile RailClone object and open the Style Editor.
-
Select the Generator.
-
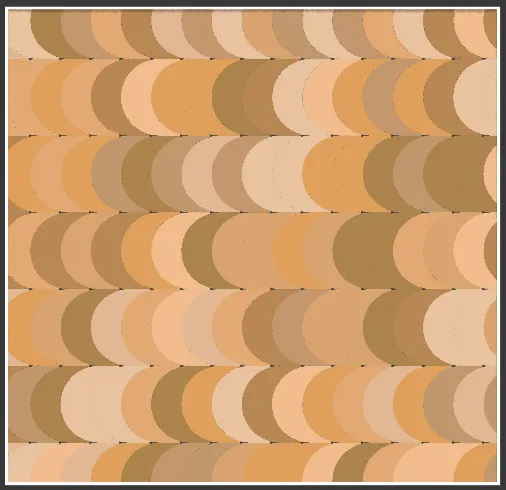
From the Properties Panel, change the Clipping Area > Expand value to 15%. As the array enlarges the gaps are gradually pushed to the edges of the clipping spline and disappear.
Using Extend X/Y Size to Area to create Vertical styles
The most important thing to understand when working with clipping splines is that the projection axis relates to
RailClone's local coordinate system. The axes of the spline itself are ignored. This means that if you want to
create a vertical or angled style with RailClone using Extend X/Y Size to Area you must rotate the RailClone object so
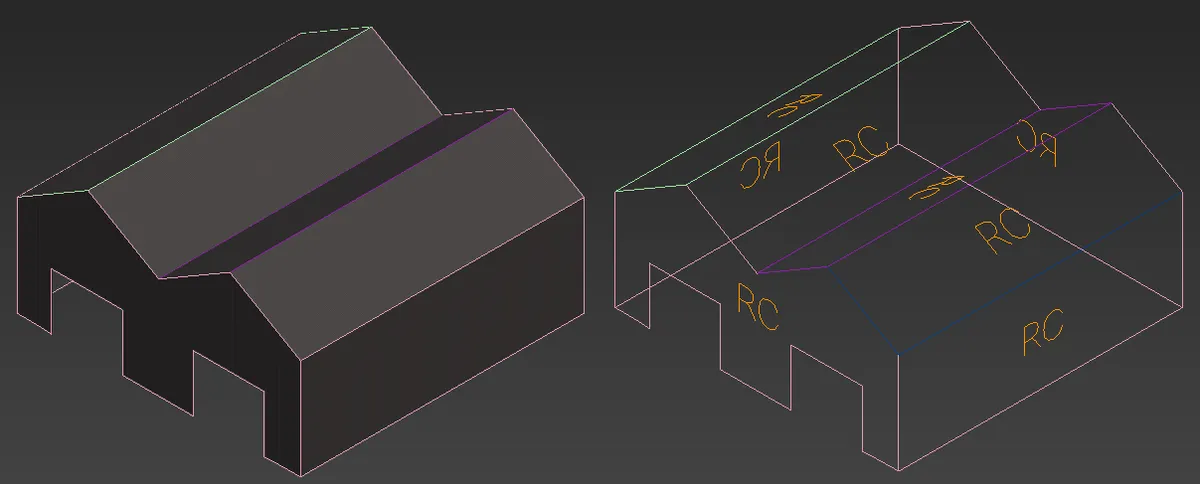
that it is oriented correctly. To see an example of this, open chapter_6_cladding_vertical.max
download. This scene uses multiple RailClone objects to
add a simple cladding style to the sides and roof of a structure. In the scene there is also a version where the splines
have not yet been selected so that you can see how the RailClone objects are aligned in relation to their clipping
spline in order for them to work correctly.
Related Tutorials
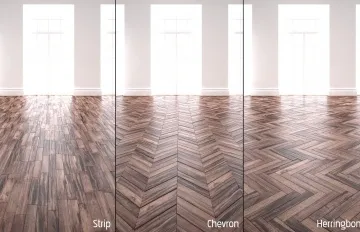
Follow this tutorial to create three types of parquet floor. These styles all use a perimeter spline to automatically set the size of the array.
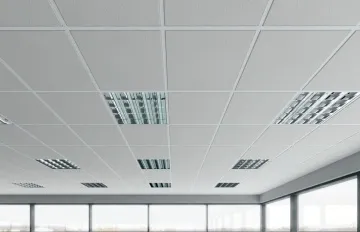
Creating Ceilings with RailClone
Follow this tutorial to create a suspended ceiling that uses a perimeter spline to automatically set the size of the array.
For more information please see the clipping area section of the 1D arrays - Generator L1S and 2D arrays - Generator A2S sections of the online documentation.