How to use Surfaces
If you want a RailClone style to follow the contours of terrain, then RailClone has got you covered with the Surface object type. This powerful feature has pleasingly few settings, but can save a lot of time spent creating splines to follow a landscape. To use it, all you need to do is add a Surface node to your graph, pick your terrain, and wire it to the Generator's Surface input. Once this is done, all the segments used in the style will be projected along the RailClone objects local Z axis until they meet the surface geometry.
Like all of RailClone's features this is fully parametric and interactive. Editing either the surface's source geometry or the spline path will result in instant feedback in the viewports, making it invaluable for a fast iterative workflow.
In the following exercises we'll learn how to use surfaces with L1S and A2S arrays, as well as sharing some tips to make working with this powerful feature as simple as possible.
Exercises
Exercise: Using Surfaces with an L1S Generator
Using a surface with the L1S generator is as easy as attaching a single node. Let's take a look at how we can add a surface to a brick wall so that it's smoothing follow the terrain.
-
Open
chapter_5_surfaces_1.maxfrom the downloads for this guide. -
Select the existing brick wall RailClone object and open the Style Editor.
-
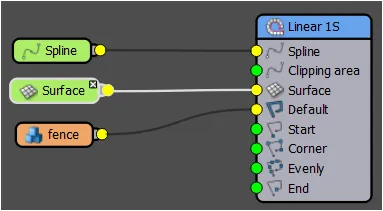
Drag a new Surface object to the Construction view.
-
Wire the Surfaces node to the Surface input if the L1S Generator.
-
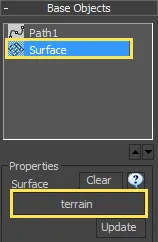
From the Base Objects rollout in the Modify Panel, select the surface from the list then click the surface picker button and select the object called terrain from the scene.
-
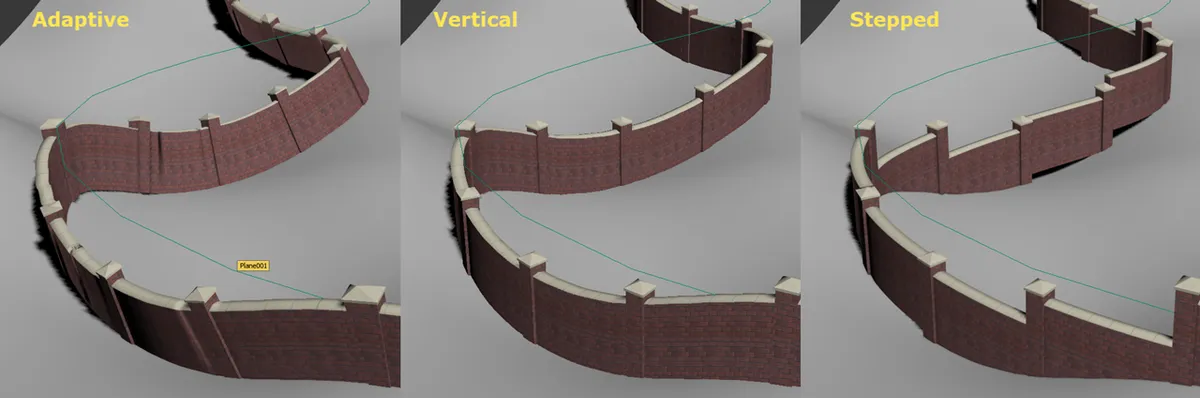
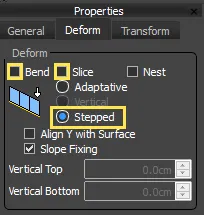
For the two segment's change the Properties > Deform node to Vertical. This will stop the wall from banking as it follows the projected spline path. 7. Finally, to make the deformation smoother, go to the Style Rollout in the Modify Panel and increase the number of Curve Steps to 50.
The Segment's Properties > Deform Mode will still influence deformation when using a surface, and as the spline is changed when projecting onto an undulating surface you may see some behaviour that wasn't apparent when the spline was flat. In particular when using Adaptive mode, you may notice the segments are no longer upright. This is due to the segments banking as they follow the uneven spline. To fix this you can change the mode to Vertical or Stepped.
Segments are projected along the RailClone object's local Z axis until they hit a surface. Any faces in the surface object which are facing away from this axis will be ignored. For this reason it is also important that the face normals are not inverted as can often be the case with imported geometry. If the surface is not behaving as you'd expect, try adding a Normal modifier and turn on Invert Normals.
Align Y with Surface (L1S Only)
As well as deforming along the Z axis, when using an L1S generator segments can also conform to the surface on the Y Axis. This is enabled individually for each Segment and can be found in Properties > Deform > Deform > Align Y with Surface. When the option is off (the default setting), then the segment's remain vertical. If Align Y with surface is turned on, then the segment will rotate so that it is perpendicular to the surface.To see how this works, try the following exercise to project a road and barriers onto a camber.
Exercise: Align Y with Surface
-
Open the file named
chapter_5_surfaces_2.maxfrom the downloads for this guide, you'll see a surface, a road and a barrier.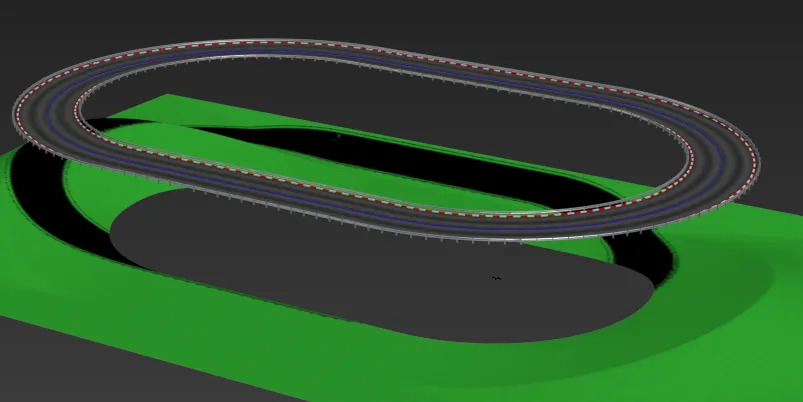
-
Select the Road RailClone object and open the style editor.
-
Wire a new Surface node to the Generator's Surface input. Open the Surface nodes properties, click and select the object named terrain. The road will now project to the surface, but it will intersect as it's not following the geometry on the Y axis.

-
Select the Segment node and go to Properties > Default and activate Align Y with Surface. the road will now conform to the surface on the Y axis.
-
Repeat the above steps for the Barrier RailClone object. When this is done both the barrier and the road will follow the terrain and orientate so that the segment's Z axis is perpendicular to the surface. Both the spline and surface can be edited interactively to give you instant feedback.
Using Surfaces with an A2S Generator
- Open the file named
chapter_5_space_frame_start.max. - The RailClone object in this scene creates a space frame using an A2S array. Let's deform it to follow a surface. Go to the Styles rollout and open the Style Editor.
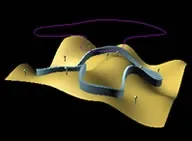
- Drag a new Surface object from the Items List to the Construction View and wire it to all 4 generators. Open the Surface node's properties, click and select the object named deformer. The space frame will now deform to follow the surface!
In this example the surface is only used to deform the RailClone object, and we don't want to see it in the final image. To remove it from renders, right-click on the surface and select Properties. from the Object Properties options, turn off Renderable.
In the example above you'll notice that the geometry deforms automatically on the X and Y axes to follow the curvature of the surface. When using an A2S array the Align Y with Surface checkbox has no effect. However, you do have the ability to change the Deform node to create a variety of different effects. In the next example we'll look at using a surface with segment's set to Deform > Step node to create a ceiling.
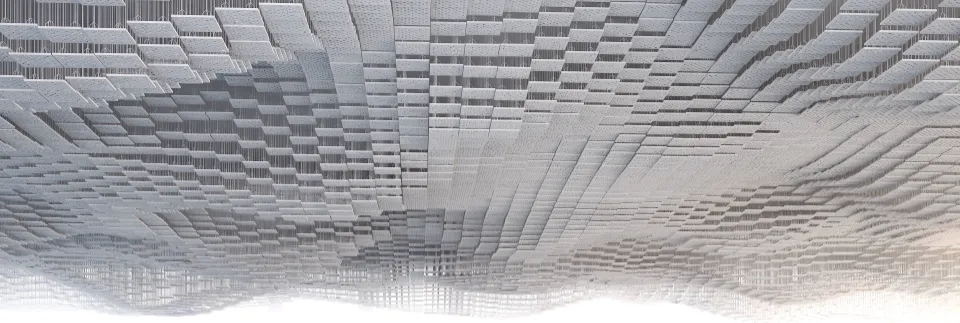
Exercise: Using Surfaces with Stepped Mode
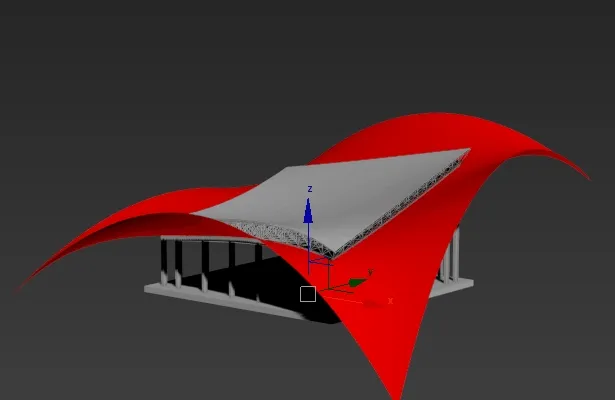
In this example we'll look at how surface mode could be used to create an undulating suspended ceiling. In this case we don't want the geometry to deform to follow the surface. This will ensure that the style looks correct, but also that instancing is maintained for maximum rendering efficiency.
-
Open
chapter_5_suspended_ceiling_start.maxfrom the downloads for this guide. The scene already contains a style with two A2S array, one for the tiles and another for the ceiling supports. -
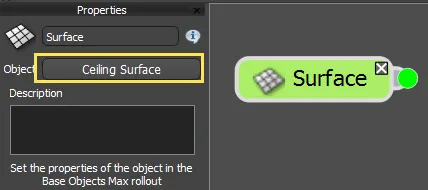
To add the surface, create a new Surface node and select Ceiling Surface as the source.
-
Wire the Surface node to the Surface input of both generators
-
The segments in both generators will be deformed to follow the curvature of the surface. To fix this we need to change the Segment's properties...
-
For each segment change Deform Mode from Adaptive to Stepped As the segments are no longer deformed they will remain instances and us substantially less memory. If you wanted to be thorough and force all the segments to render as instances you could also turn off Bend and Slice.
Extending Boundaries
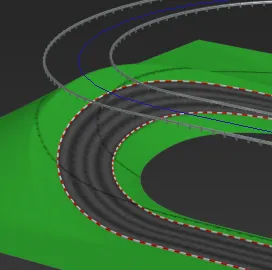
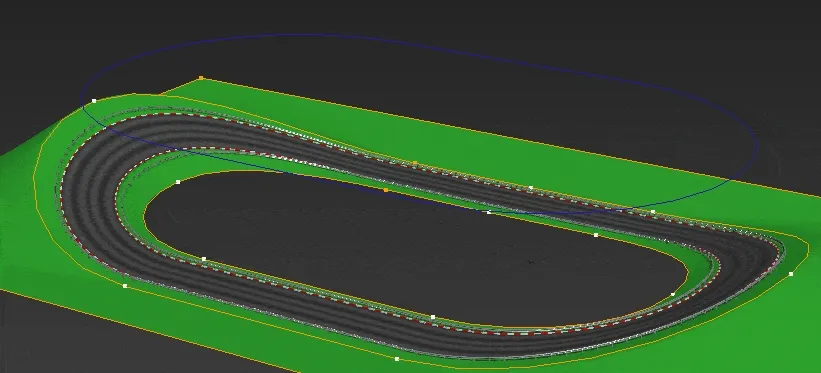
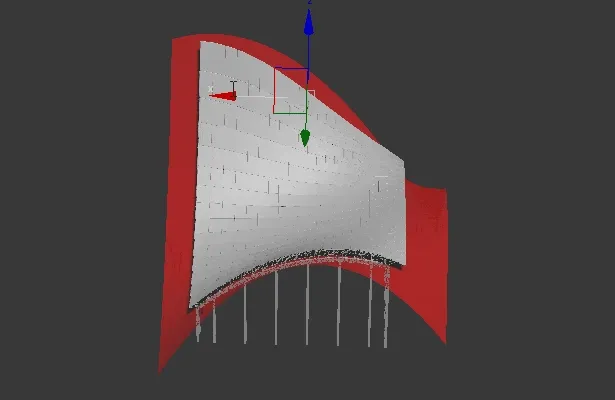
It is important when using surfaces that the array is completely enclosed within the boundary of the surface. Any geometry which falls outside the boundary will be deformed incorrectly, as you can see in the example below.
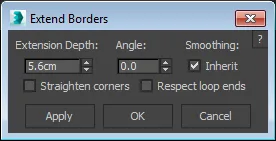
You may also get deformation if the boundary of the spline and the boundary of the RailClone object are exactly the same. Surfaces work best when they are slightly larger that the RailClone object that they deform. This situation can often occur if you extract a clipping spline to use in RailClone from the surface's perimeter. If you do this then you should also extrude the surface's open edges slightly so that they are larger than the clipping spline. For complex surfaces getting a decent extrude that continues the direction of the adjacent polygons can be tricky, but we find the Extend Borders script by Racoon Artworks does a pretty good job.
In this chapter we looked at how you can use Surfaces to deform an array and its segments. In the next chapter we'll look at how segments can be sliced using closed splines with RailClone's clipping paths feature.
Related Information
The Glue plugin is one of our free tools for conforming splines to a surface. In most cases this isn't required for working with RailClone which has it's own interactive algorithm for creating the same effect. However there are a couple of instances where you may still wish to manually create a spline to follow a landscape. This is usually required if you need an A2S array which has been rotated using the Generator's X-Rotate feature to follow a surface. At present RailClone's surface feature does not work with this configuration so as a workaround you can manually create the spline using the Glue plugin
For more information please see the 1D arrays - Generator L1S . 2D arrays - Generator A2S . Segments and Surface sections of the online documentation.