How to Control Material IDs and UVWs
RailClone provides a powerful set of tools to control the UVW mapping and Material IDs of segments. Not only is RailClone able to Randomise material IDs and adjust the position, rotation and scale of existing UVW coordinates, but it is also possible to generate new box mapped UVWs automatically that follow the source path. This is ideal for situations where you need the texture to bridge multiple adjacent segments and create the illusion of a seamless unified surface.
Compatibility
V-Ray is required to maintain instancing when using UVW Xform, Automatic Box Mapping and Material operators. Other renderers are supported by disabling instancing. To do this, turn off Display->Use Instancing Engine. To see a full list of which features are supported by your renderer, check the compatibility list .
Randomising and Sequencing Mat IDs
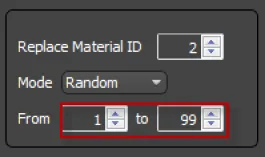
RailClone includes a Material operator that allows you to select a material ID and randomise or sequence it between a minimum and maximum value. To use it, all you need to do is wire a new Material node between a segment and the generator, choose the material ID to randomise using the Replace Material ID value, and set the Range using From and To values:

Exercises
Exercise: Randomising Shirt Colours
To see how this works in practice we will edit a style to randomise the colour of t-shirts between 4 colours. To see the
existing style, open chapter_4_randomise_ids_start.max from the
downloads for this tutorial. This style uses two
segments: the t-shirt on the hanger, and a separate hook.
When randomising IDs it's important that the source geometry and materials are set up correctly. You'll need to know the material IDs of the elements you wish to randomise and also the range of IDs in the multi/sub object material that you intend randomise between. In the following example the T-Shirt has separate ID's for the logo colour and the sleeves.
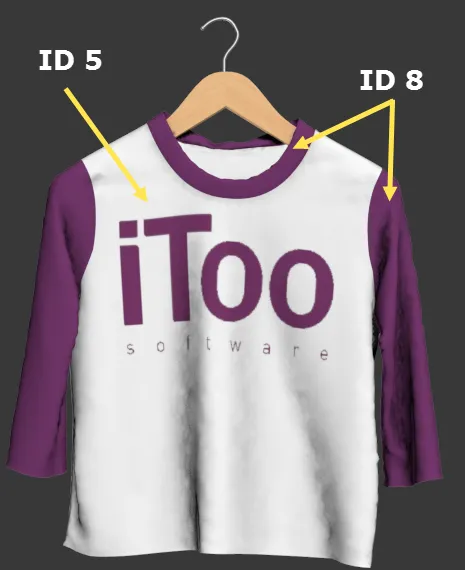
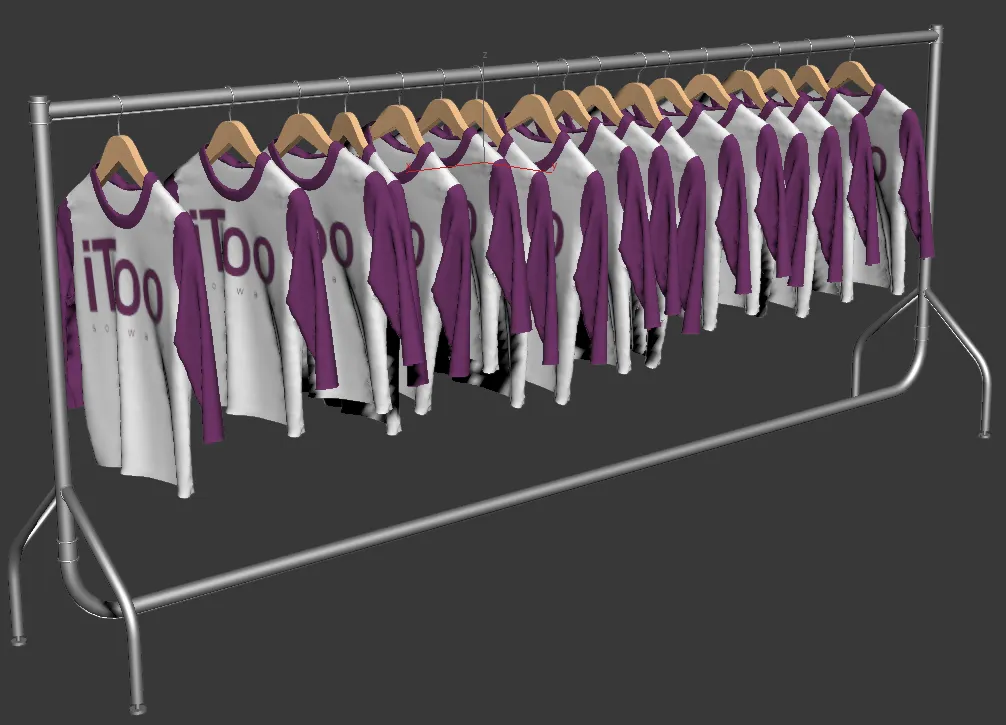
The material is created so that each colour is divided into two blocks of 4 colours, with the logo between ID 4 and ID 7 and the sleeves between ID 8 and ID 11
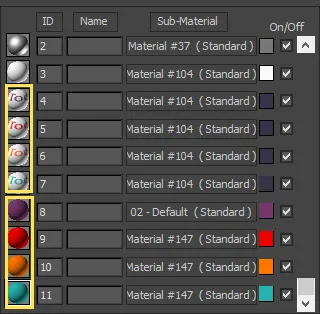
With that information, we can update the style to randomise the colour of the sleeves.
- There are two shirt styles already in the scene, select
rc_shirts_1(we'll use the other one for the next exercise). - Open the Style Editor.
The style has already been set up so that only the Material operators need to be added. However, if you want to know a little more about how this style works then the notes below should help.

-
The t-shirt style uses a simple L1S array driven by a spline path.
-
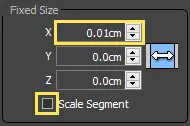
Thought the shirt and hanger are a single segment, the hook has been separated so that its rotation can be randomised for a little extra variation. To stop the rotation affecting the position of the adjacent segments, a small Fixed Size value is used with Scale Segments turned off.
-
Right padding is used on the shirt segment to create a gap between hangers. This has been exported, so you can adjust it from the Modify panel.
-
The Transform operator is used to subtly randomise the rotation. Fixed Rotation is used with Random number operators to generate the same values for the hook and the shirt. Using the built-in Randomise Transform settings would result in different values for these segments, and they would no longer align correctly.
-
The mirror operator is set to X and Y to flip the hanger over the railing. This is to add greater variety and "messiness" but the on/off parameter for the generator has been exported, so you can disable it if you choose.
-
This is an empty segment with a fixed size setting of 15cm. It is wired to a randomise operator along with the geometry to randomly generate gaps in the array.
-
The generator's Z Offset has been exported so that you can adjust the hanging height of the shirts to match the rail.
-
Create a new Material operator and wire it between the existing Randomise operator and the Generator.
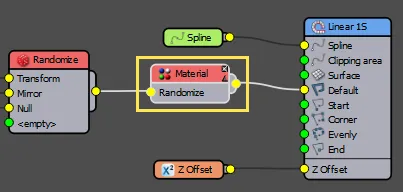
-
Select the Material node and go to the properties panel. The sleeves use Material ID 8 to enter this value for Replace Material ID.
-
To set the range enter 8 is the "From" value and 11 in the To value.
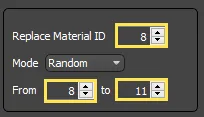
The sleeves are now randomised between 4 colours!
Randomising multiple IDs
As you can see, the Material operator can only randomise or sequence one ID at a time. If you would like to randomise multiple IDs then this can be easily achieved by wiring together a sequence of material operators as shown below.

Exercise: Randomising the logo colour
In the T-Shirt example we have randomised the sleeves but not the logo. To randomise this as well, follow these steps.
-
Wire a second Material operator between the existing Material node and the generator.
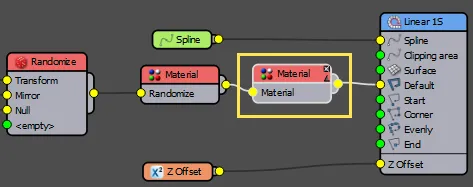
-
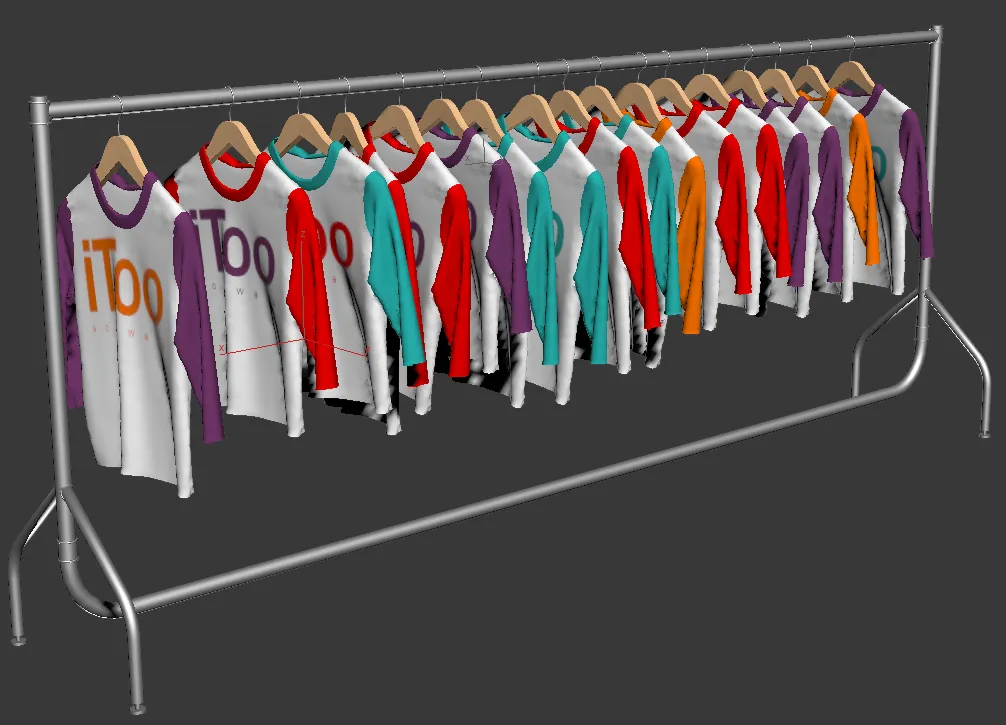
Change the new Material operator's Replace Material ID value to 4. Set the "From" value to 4 and the To value to 7. The logo and the sleeves are now randomised!
Randomising by RailClone object, spline, spline section or segment
In the clothes example you will notice that the sleeves and the logos are randomised separately so the colours often do not match. If you need to synchronise the colour of different material IDs on the same segment then you will have to set up the two Material operators slightly differently. Instead of using the From and To values to set the randomised range, you can export the values and wire them to a Random number node.
The Random Number node is useful for those parameters that do not already have a randomisation feature, or if you want more control over when a new random number is generated. For example Segment and Transform nodes already have parameters to randomise the translation, rotation and scale of a segment, but they generate a new number for every segment. What if you wanted to generate a new value only at the start or for each spline, section, or y evenly row? For this you can use the Randomise node to precisely
control when a new random number is generated, and because the value is exposed it can be wired to multiple nodes so that values can be synchronised or offset using arithmetic operations.
Exercise: Matching the sleeves and logo colour
In the shirt example we have 2 block of material ids: The logo IDs are between 4 and 7, and by adding 4 to these values we get the corresponding sleeve colours, between 8 and 11. To make sure they are always in sync we need only create a single Random number node that picks a number between 3 and 7 for the logo and then wire this to an arithmetic node that adds 4 to get the corresponding sleeve colour:
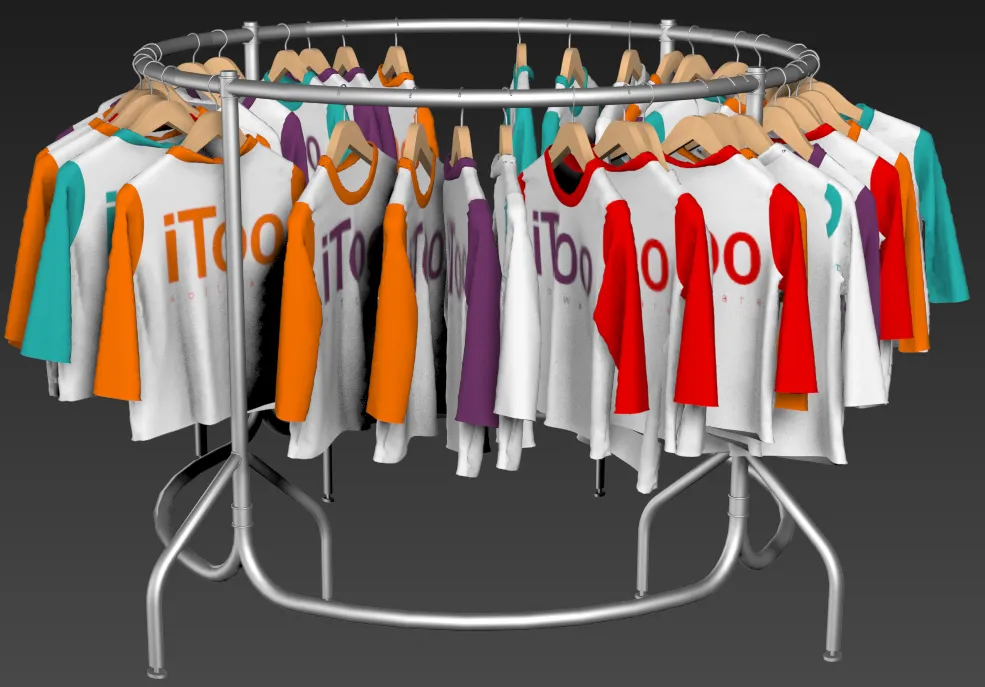
To test this, select the second RailClone object, open the style editor and then follow these steps:
-
Wire a new Material operator between the existing Randomise node and the Generator.
-
Set the Replace Material ID value to 4.
-
Right-click on the Material node and export From and To.
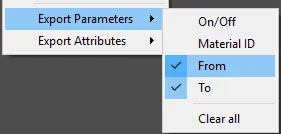
-
Create a new Random number node and connect it to the Material node's From and To inputs.
-
From the Properties panel, set Random number node's Min value to 4 and Max value to 7.
-
Set the Random Node's Generator On node to Segment. The logos should now be randomised.
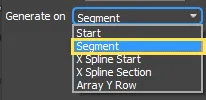
-
To randomise the sleeves, wire a second new Material operator between the existing Material node and the generator, then right-click on the new Material node and export From and To.
-
Create an Arithmetic node and wire the output to the new Material node's From and To inputs. Leave the arithmetic node set to its default Addition node.
-
Wire the Random Number node to the Arithmetic node's first input.
-
Create a new Constant node and set its value to 4. Wire this to the Arithmetic node's second input.
-
You will now have a style with randomised colours, but this time the logo and sleeve colours match!
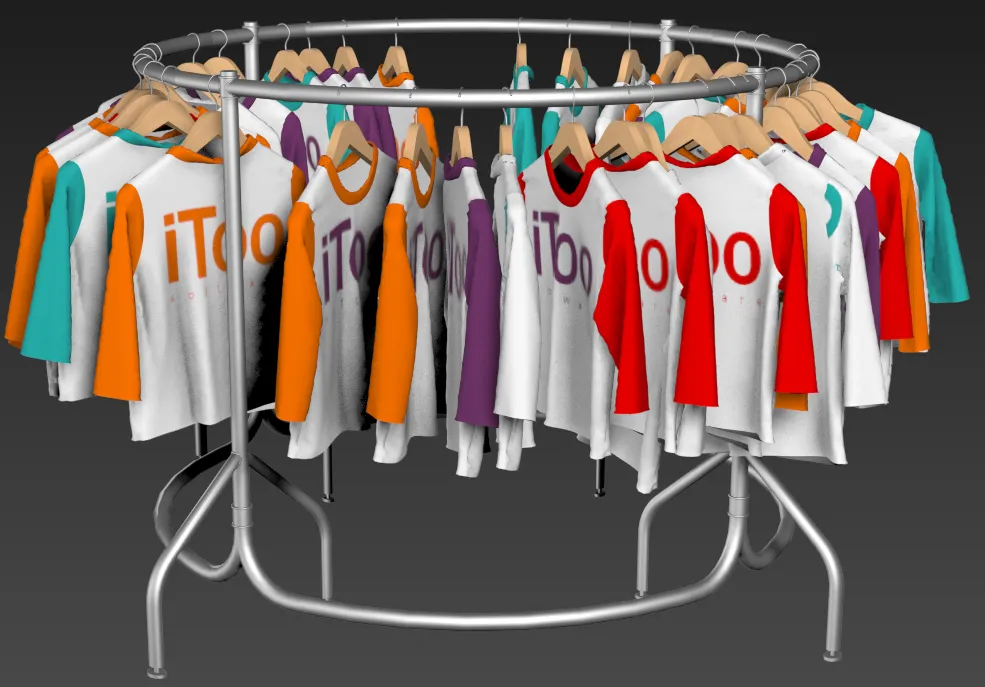
Exercise: Randomising by spline and spline section
In a second example, the Randomise operator is used to add different colours to curtains to add some variety to an exterior view. As you can see the same problem has arisen where each individual curtain takes a different random colour.
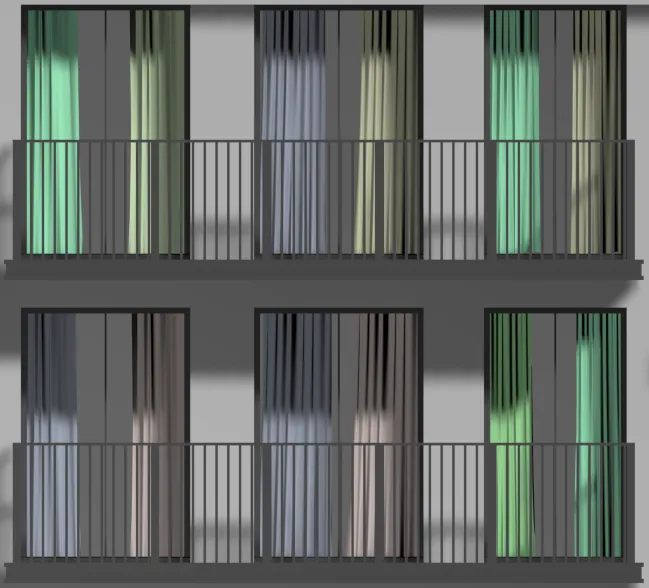
It is unlikely that somebody would use different coloured curtains in the same window, so let's fix this using the technique demonstrated in the t-shirts exercise above. We'll then look at how we can ensure the curtains are the same in every room as well as every window.
- Open
chapter_4_curtains_start.maxfrom the downloads for this tutorial. - Select the Curtains RailClone object and open the Style Editor.
Once again, the majority of this style has already been set up so that only the material operators need to be added. However, if you want to know a little more about how this style works then the notes below should help.

- A linear array is used driven by a spline object which uses a separate spline sub-object for each room. The windows are identified by a spline segment with an ID of 1. Sections of a room that are not a window are indicated by a spline segment with an ID of 2. This is so that the same splines can be re-used to drive the balconies.
- Seven curtain segments are wired to a Randomise operator to create variation.
- The curtains are then wired to a Compose operator twice, with an empty "null" segment between them to create a gap. This set of 3 segments is stretched on each splines section by setting the Generator's default mode to Count and setting the Count value to 1.
- The size of the gap between the curtains is randomised by wiring a Null segment to a Transform operator and exporting the X Fixed Size parameter. This value is then driven by a Random Number node.
- The Conditional operator limits the segments so that they only appear on spline segments with an ID of 1.
- The Material operator randomises the materials, this is the part we need to change in order for this style to work correctly.
- There is a null segment in the corner input to force a break in the spline where the ID changes. Without this a single set of curtains would be stretched along the full length of the spline.
-
Right-click on the Material node and export From and To.

-
Create a new Random number node and connect it to the Material node's From and To inputs.
-
This time there are 10 materials in the multi-sub object material for the curtains so go to the Properties Panel, set the Random number node's Min value to 1 and Max value to 10.

-
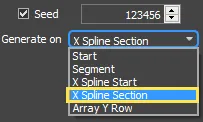
Set the Random Node's Generator On node to X Spline Section.
-
Because the curtain in each window are on the same spline section they will now match.
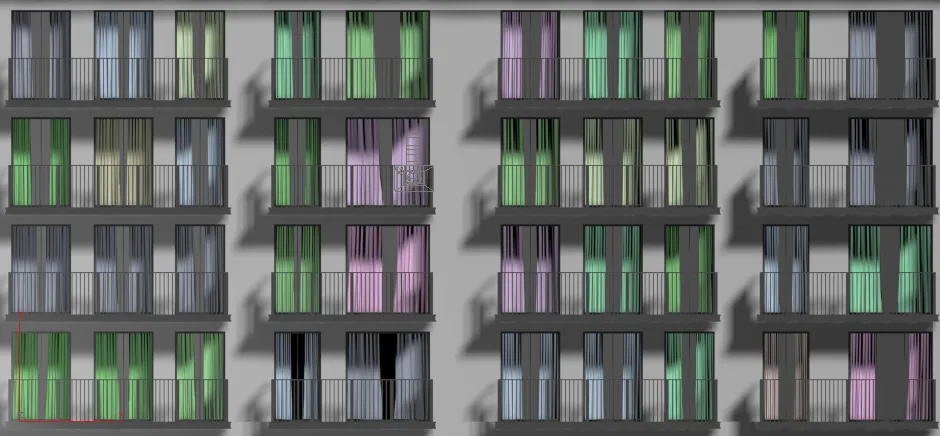
This looks better, but it is likely that several of those windows are shared by a single room.
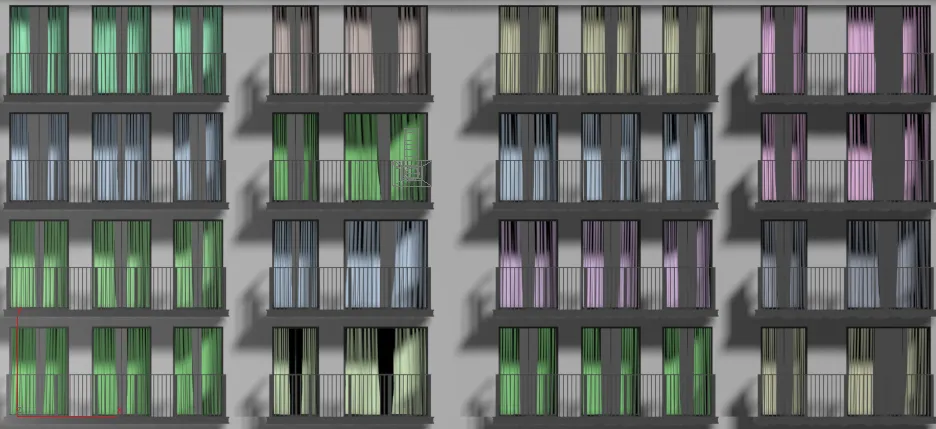
For the sake of this exercise, let's assume that each balcony marks a single room. This file has been set up so that each balcony and set of windows and curtains is using its own spline segment. Therefore, to ensure all the curtains within the same room are the same we can simply change the Randomise operators Generate On value to X Spline Start.

-
Each room now shares curtains of the same colour. You can use the Randomise operator in this way for any Parameter in RailClone. In this example we have used it to control when to randomise Material IDs, but you could also use it for transforms, Selector > index, and anything else with an exportable parameter.
Exercise: Using the Randomise operator to create a sequence of material IDs
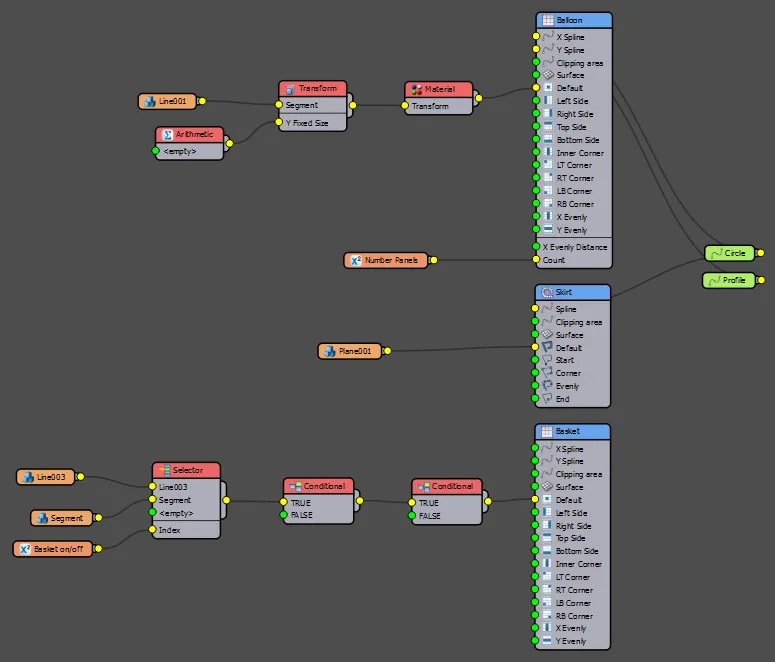
A less well-known feature of the Material operator is the ability to cycle through a sequence of material IDs. In this exercise we'll create a pattern on a hot air balloon using this feature. The RailClone hot air balloon uses 3 generators: An A2S generator for the balloon itself with the shape generated using two spline, an L1S generator to create a skirt around the bottom, and finally another A2S to position the basket. Click on the image below to see a larger view of the node tree.
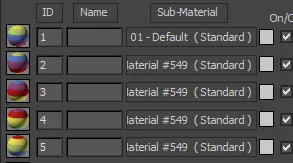
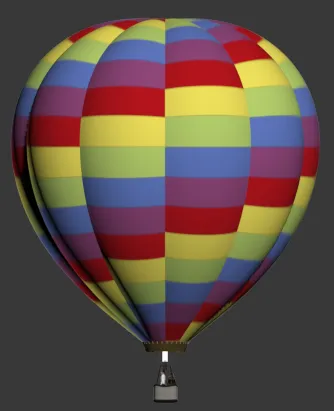
The balloon has a material applied with 5 striped patters in material ID slots 1 - 5. The texture is the same for each material but has been vertically offset by a fifth each time it is used. By creating a sequence of these 5 materials we'll add a pattern to the balloon.
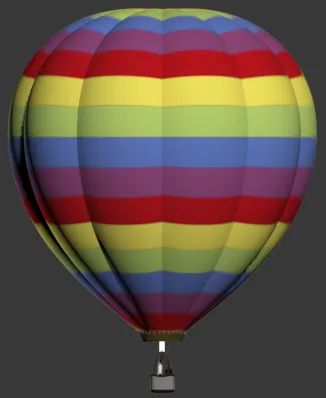
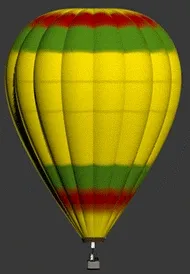
Here's how the balloon looks before we apply the material operator.
To create the pattern:
-
Open
chaper_4_balloons_start.maxfrom the downloads for this guide. -
Select
rc_balloon_1and open the Style Editor. -
The topmost A2S generator is responsible for creating the Balloon. Create a new Material operator and wire it between the Transform operator and the Generator's Default input.
-
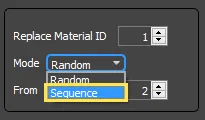
Select the Material node and change the Mode to Sequence.
-
Enter 1 for the "From" value and 5 for the To value.
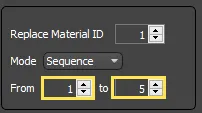
By sequencing the IDs in this way you should now have a pattern of 5 offset textures on the balloon.
We'll return to the balloons in the next section which looks at UVW XForm, another powerful modifier that enable you to adjust existing UVW coordinates on segments.
UVW XForm Operator
The UVW XForm operator allows you to easily edit and randomise the offset, tiling and rotation of existing UVW coordinates. It's particularly useful when you need a lot of texture variation, but you don't want to have to create time-consuming Multi/Sub-Object materials and randomise material IDs. (Of course for even more variation - both techniques can be used together!)
Editing existing UVWs
To help illustrate how the operator works, in the following gifs the texture shown above has been applied to a simple tile mesh. A single tile has been mapped before adding it to the RailClone style so that only one of the 256 coloured alphanumeric tiles are displayed.
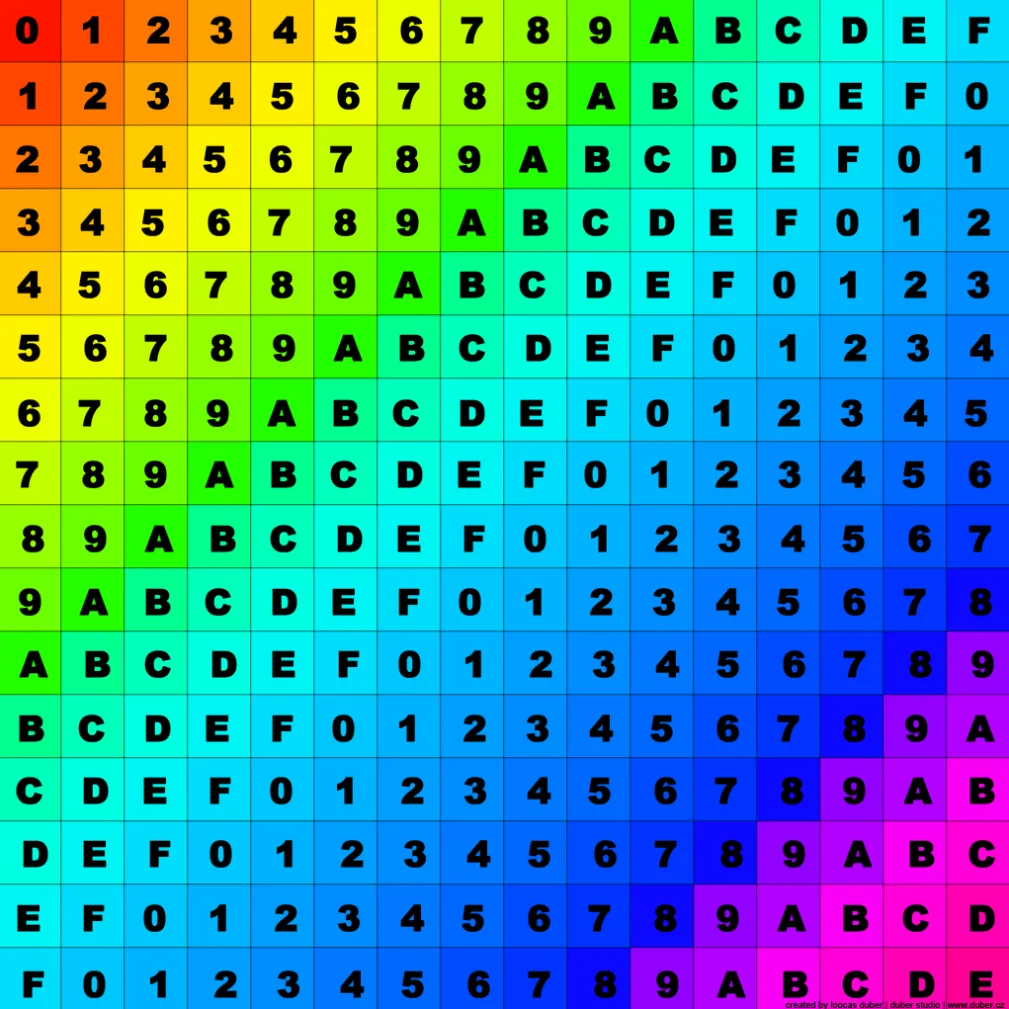
You can choose to edit any Map Channel, or if you'd prefer to affect all the channels, turn on Apply to All Channels. if you want to adjust a limited selection of channels, for example map channels 1 and 3, you can use multiple UVW XForm operators wired together in series.
The Fixed group allows you to edit the Tiling, Offset, and Rotation if the existing mapping. There are independent controls for each of the U,V and W axes.

In the following short exercises we'll return to our balloon models and use the UVW XForm operator to edit the patterns. In all these examples we use only a single texture instead of the 5 required to create the pattern in the previous exercise.
Exercise: Editing UVW Tiling
-
Open
chaper_4_balloons_start.maxfrom the downloads for this guide. -
Select
rc_balloon_2and open the Style Editor. -
Wire a new UVW XForm operator between the Transform operator and the Generator's Default input.
-
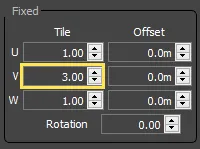
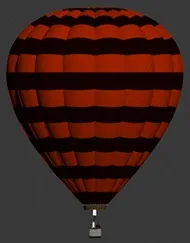
Select the UVW XForm node and set the Fixed > Tile > Y value to 3
Exercise: Editing UVW Offset
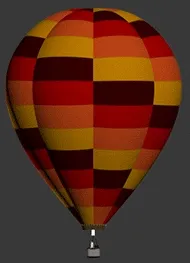
In this example we use the sequence operator in conjunction with UVW Xform to create the pattern
-
Select
rc_balloon_3and open the Style Editor. -
Wire a new Sequence operator between the Transform operator and the Generator's Default input.
-
Create a new UVW XForm operator and wire it to the Sequence operator's second input. Wire the Transform operator to the UVW Xform node's input.

-
Select the UVW XForm node and set the Fixed > Offset > Y value to
0.005m.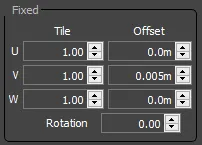
Exercise: Using Expressions with UVW Offset
The last example was straight forward but what if we needed to offset the pattern many times. Rather than create and edit a lot UVW Xform nodes we can use just one with an expression.
-
Select
rc_balloon_4and open the Style Editor. -
Wire a new UVW XForm operator between the Transform operator and the Generator's Default input.
-
Right-click on the UVW XForm node and export Fixed > Fixed Offset > Y.
-
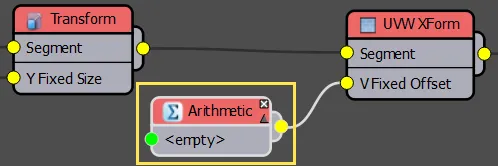
Create a new Arithmetic operator and wire it to the UVW XForm node's Y Fixed Offset input.
-
Select Arithmetic node and change the Operation to Expression.
-
Click Edit Expression to open the editor window.
-
From the list of options on the left, find and double-click on
SegmentXCounter. This will return the number of the current segment. -
After this enter
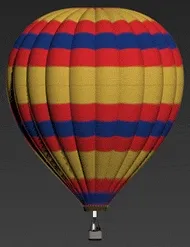
0.25to the finished expression readsSegmentXCounter 0.25This expression will offset the UVWs by
0.25for every segment to create the pattern. -
Click OK to close the Expression editor.
Exercise: Editing UVW rotation
In this exercise we use the technique from the previous example, plus UVW rotation to create the spiralling pattern
-
Select
rc_balloon_5and open the Style Editor. -
Wire a new UVW XForm operator between the Transform operator and the Generator's Default input.
-
Right-click on the UVW XForm node and export Fixed > Fixed Offset > Y.
-
Create a new Arithmetic operator and wire it to the UVW XForm node's Y Fixed Offset input.

-
Select the Arithmetic node and change the Operation to Expression.
-
Click Edit Expression to open the editor window.
-
Enter the expression
SegmentXCounter\*0.2. -
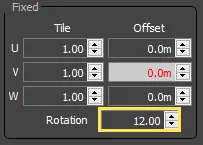
Select the UVW XForm operator and enter 12 in the Rotation property.
Randomising existing UVWs
The UVW XForm operator also includes powerful randomising features. Using these you can create a tremendous amount of variation from a single map. There are separate controls to randomise the tiling, offset and rotation. All you need to do is click the checkbox and set a minimum of maximum value.

For an example of this technique in action, let's take a look at a cladding style.
-
Open
chapter_4_wood_facade_start.maxfrom the download for the tutorial. The wooden parts of the facade are using the texture show below.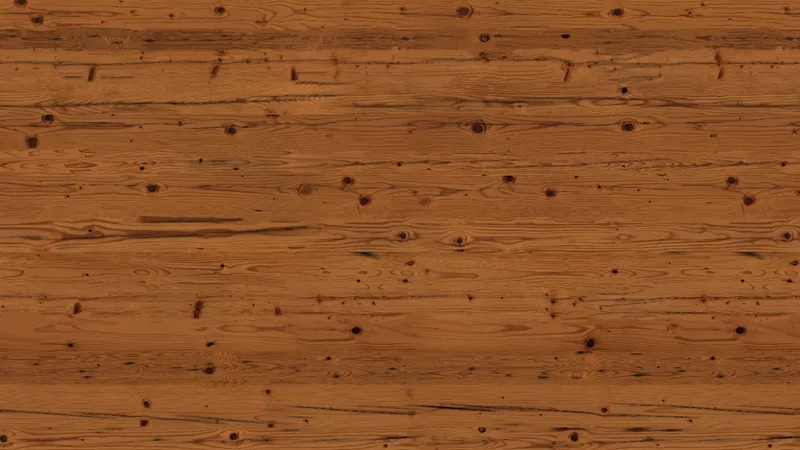
-
The box segment has been mapped prior to importing into RailClone so that only a small portion (a single plank) is displayed.

-
Here's how this looks on a façade, as you can see the texture repetition is obvious. Let's fix it...
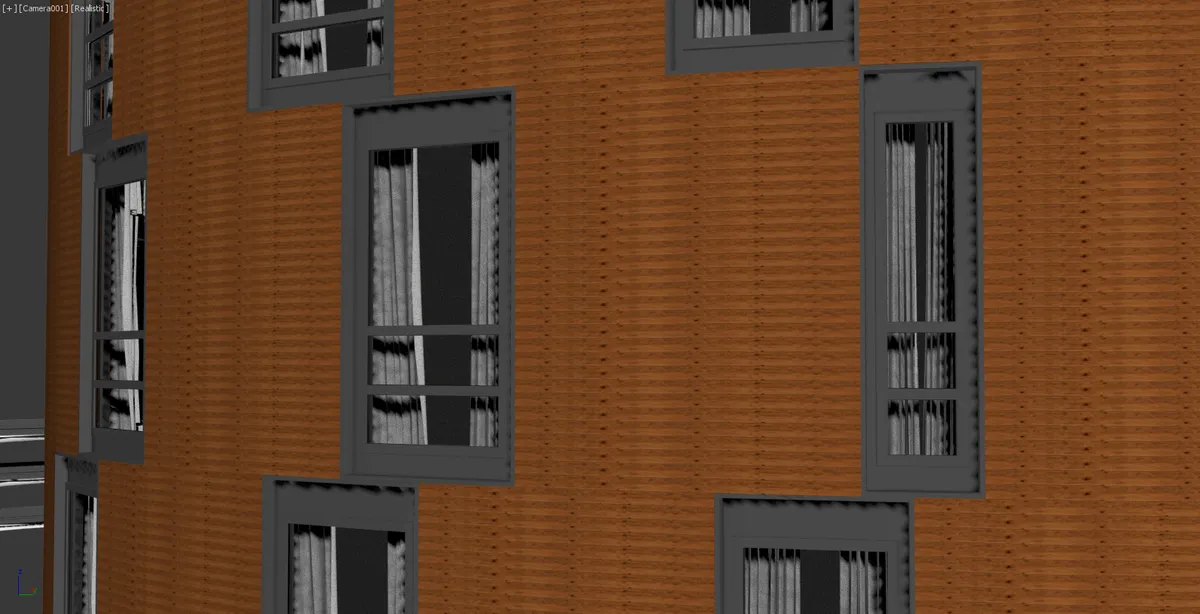
-
This scene actually has two RailClone objects, one nested inside the other. The wooden cladding is its own RailClone object, called
rc_wood.This is so that each plank can be randomised individually.Rc_woodis added as a segment insiderc_facadeto combine it with the windows. In this example we want to edit the wooden part of the facade so selectrc_woodand open the Style Editor. -
Add a new UVW XForm operator between the existing Transform node and the generator's Default input.
-
Go to the UVW XForm node's properties and click the Random tab to open the settings
-
Activate the Offset checkbox and enter -
0.01mfor the U and V minimum values and0.01mfor the maximum values. -
Each plank's UVWs will now be randomly offset, making it much harder to spot texture repetition.
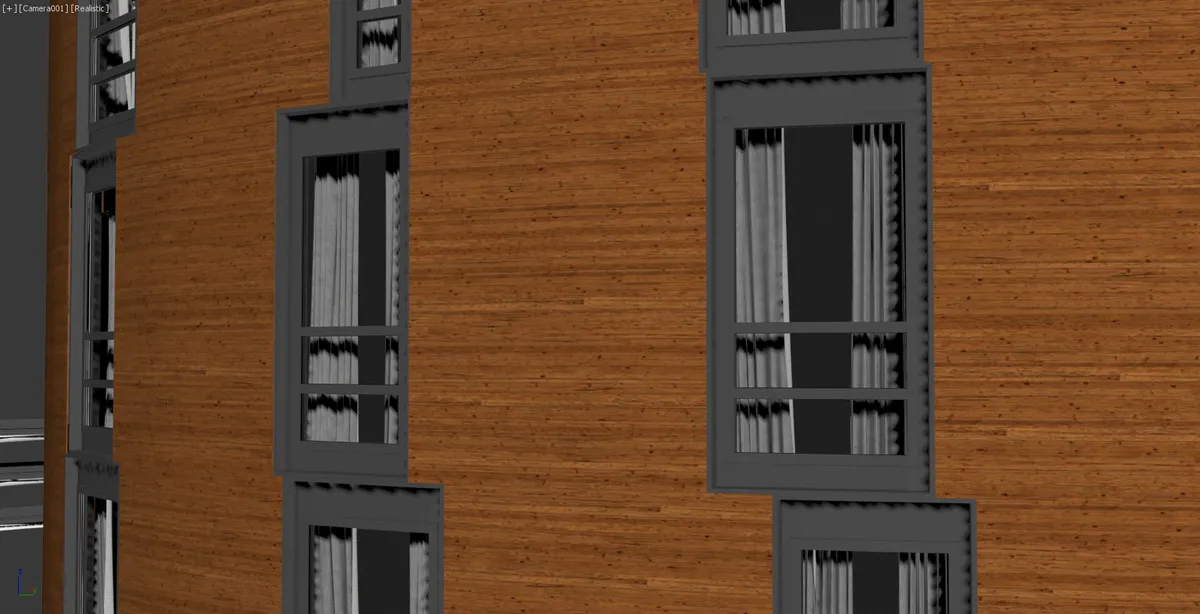
Why 0.01m?
The spinners in the UVW XForm operator use scene units. If you're using real world map sizes this makes sense and
behaves as you'd expect, but if you're using standard mapping, it's not necessarily obvious what measurements correspond
to 0 - 1 in UVW space. The answer is that 0 - 1 UVW space corresponds to 0 -1 system units. To find out what your
system units are go to Customise > Units Setup and click on System Unit Setup.
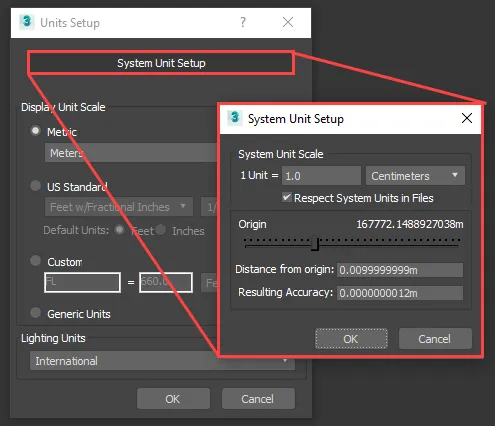
In the facade example above, the scene's system units are in centimetres, and the display units are in metres, which
explains why 0.01m is used for the offset value. Alternatively you can export the values and wire them to numeric or
constant nodes set to output float values. In this case you can use 0.0 - 1.0 to represent UV space.
To randomise UVWs using stepped increments

As well as selecting any value from within a set range, you can also constrain the UVW XForm operator to randomise using only increments of a given step value. For example, you could set the rotation range from 0 to 360 degrees, then by using a step increment of 90, you ensure it only returns values of 0,90,180, and 270. You can do the same thing for Offset, and tile.
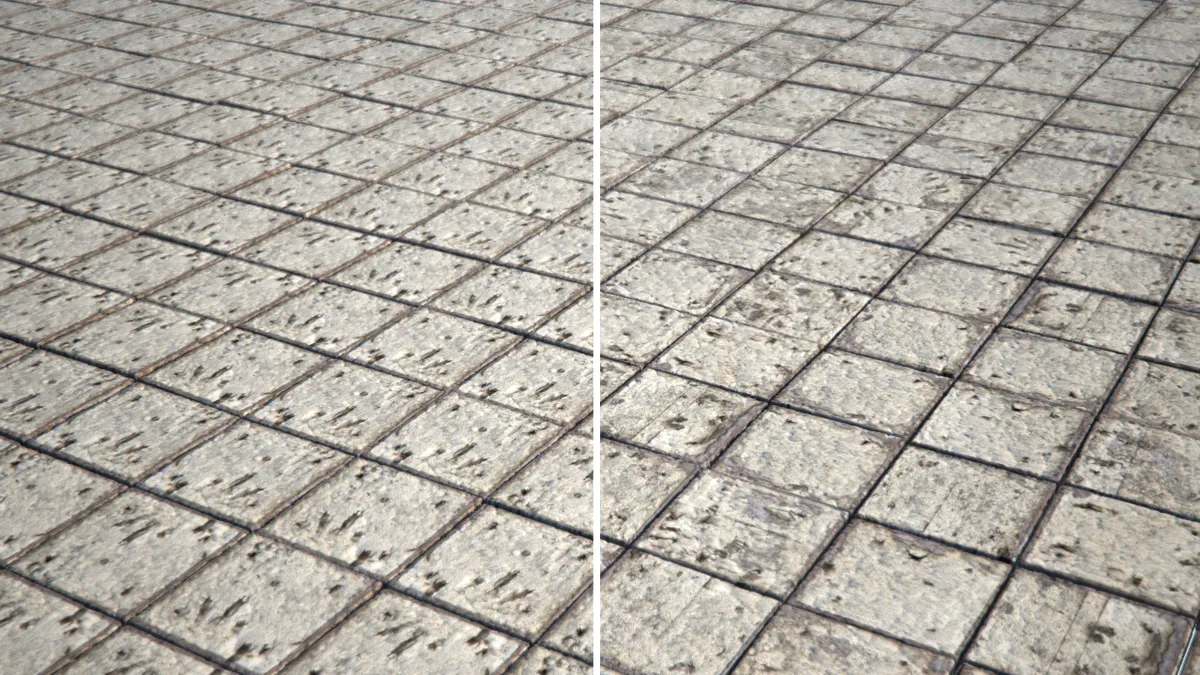
Let's take a look at a typical usage. In this example I have a single tile segment and one texture with 25 tiles in a 5 x 5 grid. Using the old workflow we'd have had to slice this texture up and create a multi sub object material with 25 material IDs. Using this operator we now only need 1 material.
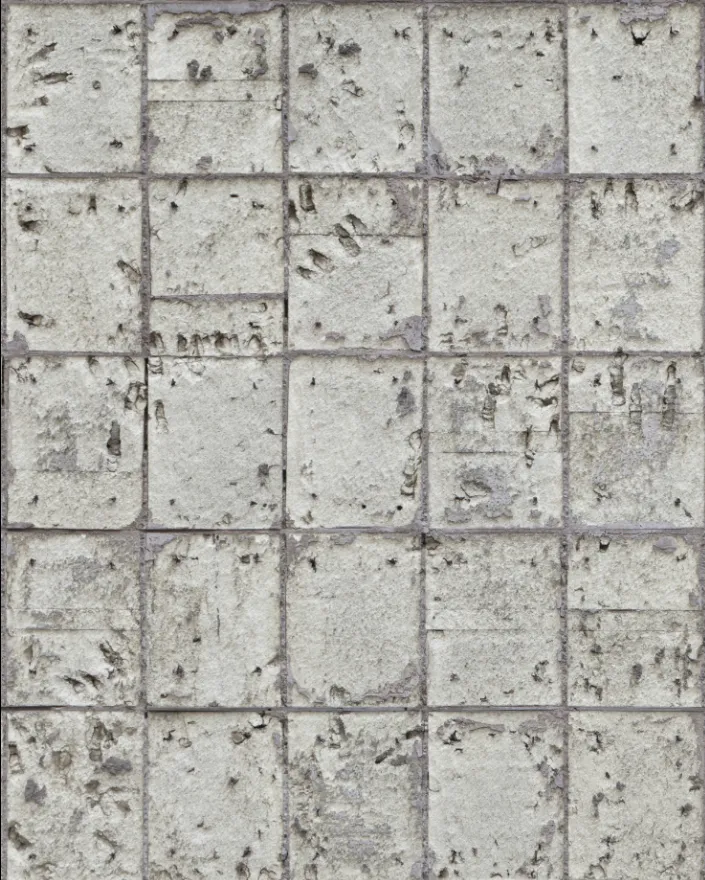
As in the previous examples. You should already have edited the UVs on the segment's source geometry so that only one tile is displayed. Then, to randomise between all 25 tiles.
- Open
chapter_4_stepped_uvw_start.maxfrom the downloads for this guide. - Select the RailClone object and open the Style Editor
- Wire a new UVW XForm operator between the existing Randomise node and the Generator's Default input.
- Go to the Random tab and activate Offset. Add a Start value of -10mm and an End value of 10mm to define the U and V ranges (assuming the scene units are set to centimetres, and the display units are in millimetres).
- Enter a Step Increment value, this should be the UV space divide by the number of tiles along a side. In this case that's a UV space of 1 divided by 5 tiles, so we need to enter 0.2. The random values returned by the operator will be multiples of this figure.
- We can add further variation by randomising the Rotation. Enter a Start value of 0 and End value of 360.
- Next enter a Step Increment value of 90 degrees.
After applying this operator the textures displayed on each segment will now be one of 25 tiles, with 4 possible rotation angles.
Automatically Box Mapping Segments
RailClone uses regular repeating segments to build objects, but this can result in obvious repetition of textures. To help alleviate this, RailClone allows you to automatically create UVWs that span several adjacent segments. To do this it uses a box mapping algorithm that is able to follow the path so if your segments deform to follow a curve - so will your box mapping! The diagram below illustrate before and after box mapping a balustrade. You can see in the first example the texture is repeated on each segment, but in the second example the texture continues seamlessly across all the segments
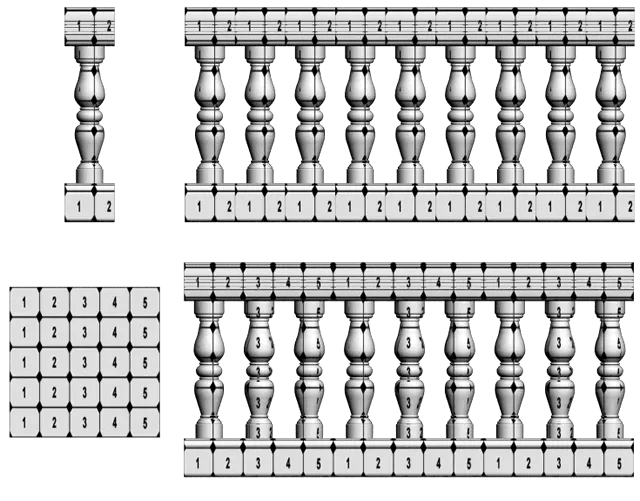 RailClone mapping
Exercise: Adding Box mapping to segments
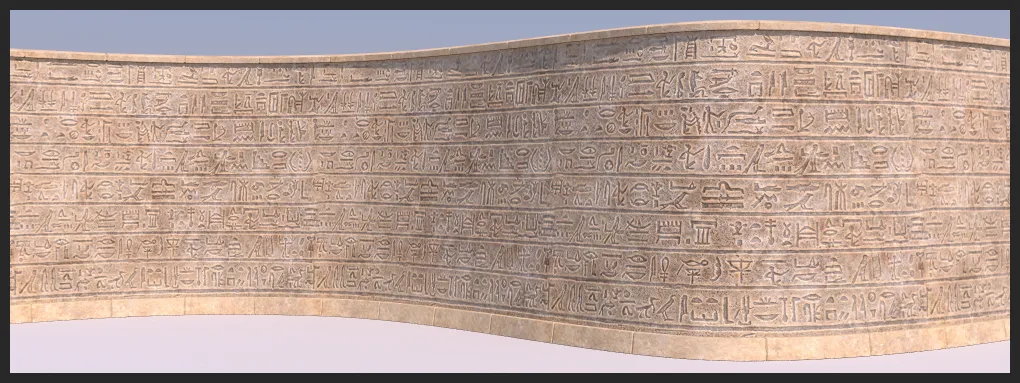
In this exercise we'll box map a simple curved wall. Without box mapping you can very clearly see the texture repetition.
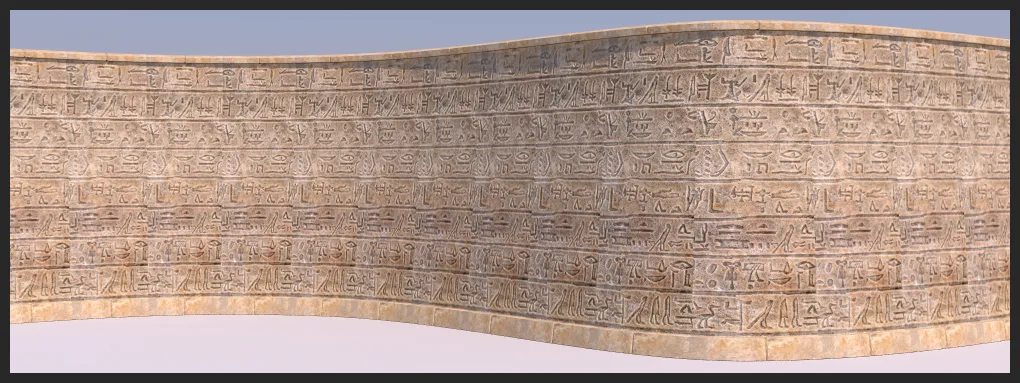
To fix this, follow these steps.
-
Open
chapter_4_box_mapping_start.maxand select the RailClone object calledrc_wall. -
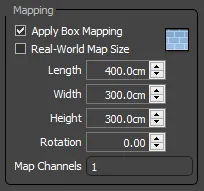
Open the Style Editor and select the Segment. From the Properties panel, choose the Deform tab and find Mapping.
-
Turn on Apply Box Mapping. You can either set the size of the box map using the Length. Width and Height settings, or if you are using materials with real world map size settings simply turn this option On. In this case we'll set a value of 400cm for the Length. 300cm for Width and 300cm for the Height.
-
You can also use the Rotation parameter to align the map correctly on the segment and set the UVW channels you wish to map. In this case we don't need to change the settings and the wall is now mapped. Texture repetition is dramatically reduced.
Using Bitmap loaders and randomizers
It is possible to use bitmap loaders and randomizers with RailClone but there are a few things you need to know.
Using multi-texture, VRayMultiSubTex, CoronaMultiMap and Mental Ray Multi-Sub Map
These map types works well provided you need all the segments in a RailClone object to have randomised materials. They are less successful if you need to add variety to specific segments in a multipart object. To use them the basic procedure is as follows:
-
Create a style with a new segment to take the randomised textures.
-
Wire the segment to a Material node and set it to Randomise. The Range chosen will determine the number of variations.
-
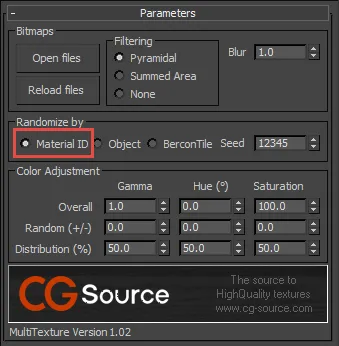
Create a new material and apply a Bercon Gradient or Multi-Texture map. For Bercon Gradient set the Type to Random and make sure the Randomise by Type is set to Material ID


For MultiTexture, set Randomise By type to Material ID or the equivalent setting in your chosen bitmap loader.
-
That's it! The textures should now be randomised.
To randomise materials on only a few segments in a multipart object
If you want to randomise only a few material IDs then the setup is a little bit more involved. The problem is that the multi-sub material loops through the IDs when the face's ID is out of range on the source geometry. Imagine that you have a Style where ID1 is not randomised but ID2 should be randomised using a bitmap loader, it would be tempting to set it up like this:
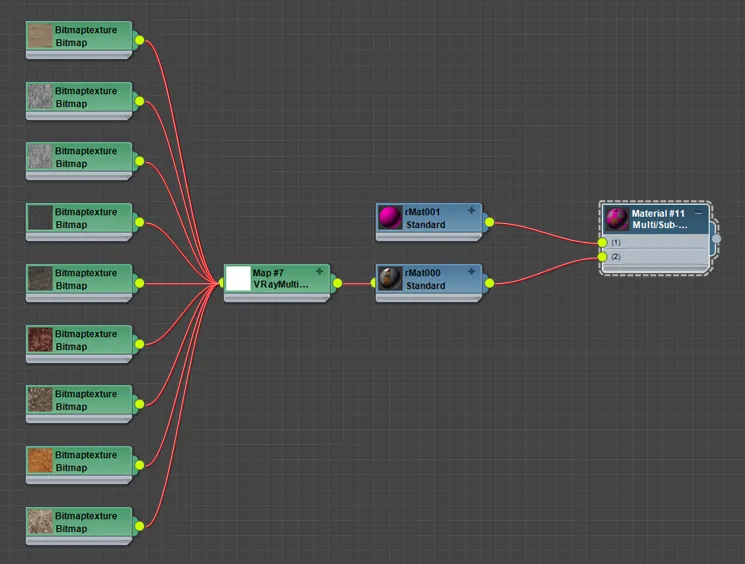
Unfortunately this won't work, if the face id is 3,5,7,9 ... you will end up with the material in ID slot 1 instead of 2
The solution therefore is to make sure that the multi-sub texture's number of IDs is the same as the randomisation range of the material operator. So in this example we have 9 textures, you would need to create a Mult-Sub material with the non-randomised material in ID1 and the randomised material with the bitmap loader instanced into ID slots 2-10.
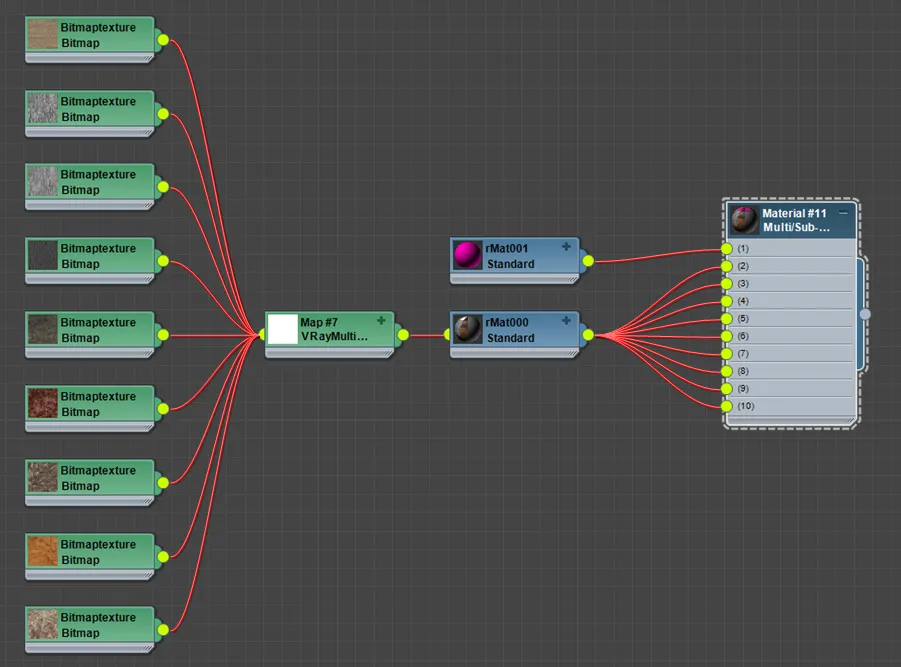
We realise that instancing a material into a large number of multi-sub texture slots can get tedious so there is an unofficial script that can help automate the process for you. You can get it on our forum here .
Using Crossmap
Alternatively you can use VizPark's Crossmap quite successfully with RailClone. This is very easy to use.
-
Use Material IDs and create a multi/sub-object material for each segment as normal
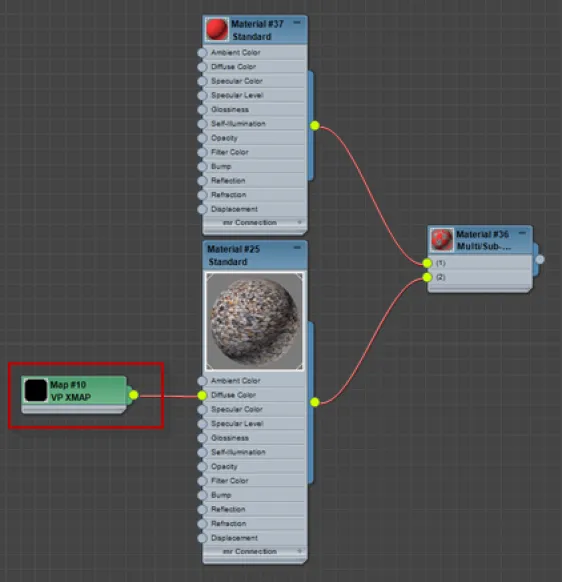
-
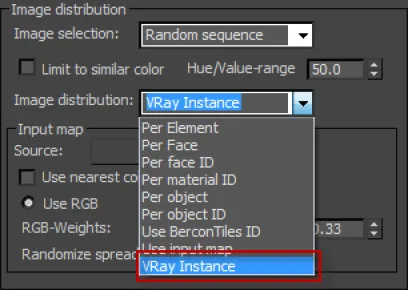
Then use the CrossMap plugin for the material you wish to randomise ensuring you set the Image Distribution settings to V-Ray Instance.
Related Tutorials
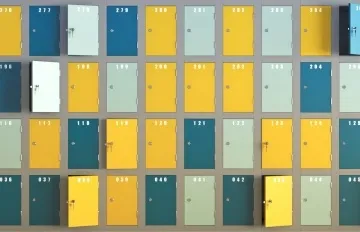
For some styles it is necessary to create numbers that increment for each segment. In this Tips and Tricks episode we look at two ways to create sequences of numbers. The first example illustrates how to create a series of numbers by cycling through geometry. In the second part we manipulate a segment's material IDs using expressions to create numbers using multi-sub object materials.
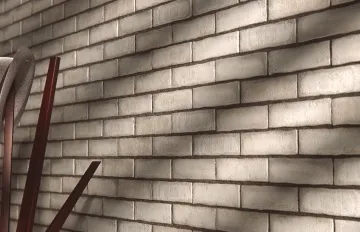
In this advanced exercise we look at a time saving graph-snippet that uses UVW XForm modifiers for automatically mapping segments and randomizing them with individual tiles or bricks from textures.
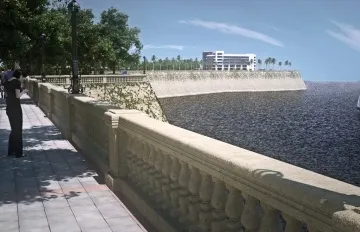
This tutorial demonstrates how to use box mapping to create a seamless stone balustrade.
For more information please see the Segments, UVW ZForm and Material operator sections of the online documentation.