How to use the library
RailClone includes in excess of 350 predefined styles, allowing you to easily add many common objects to your scenes. The built-in presets include roads, curbs, sidewalks, railway lines, bridges, street lights, ducting, trusses, curtain wall systems, theatre seating, railings, scaffold, walls and much more. Using these styles is simple, often only needing you to create a new RailClone object and a single spline. To explain the process of using a preset, we can break it down into 5 short steps.

Exercise: Loading a preset
Step 1 - Create a spline Path
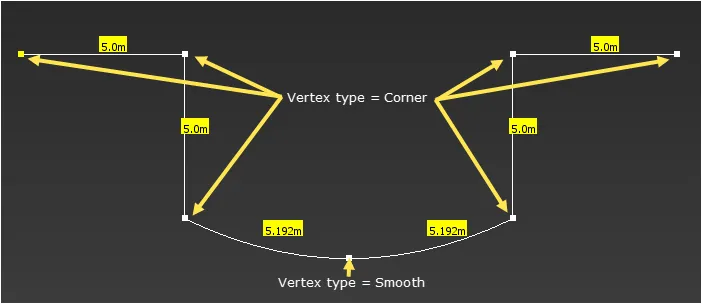
RailClone uses splines to determine not only the size, but the paths for the two array based Generators. Geometry is automatically deformed to follow the path and, In most of the library presets that use them, vertices of the Corner or Bezier-Corner type will generate a corner segment. To illustrate this we'll create a spline:
-
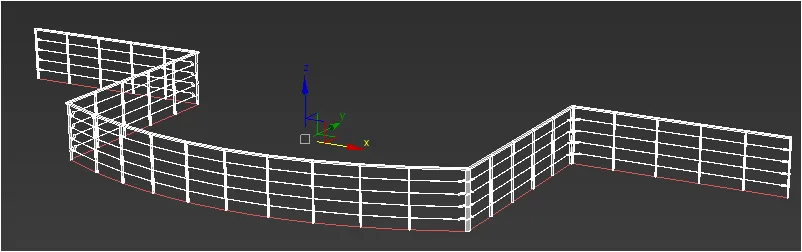
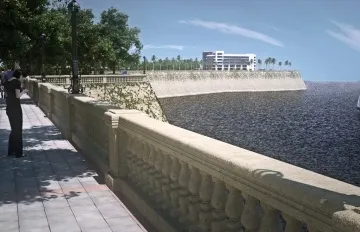
Create a new spline. It can be any shape, but in this demo we're using one as illustrated in the image below.
-
Note that the majority of vertex types are set to Corner except the one in the centre of the curved section, This vertex's type is set to Smooth.
Step 2 - Create A RailClone object
Next, create a RailClone object just as you would any 3ds Max geometry:
-
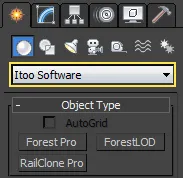
Go to 3ds Max's Command > Create > Geometry Panel and change the category to iToo Software.
-
Click in RailClone Pro button.
-
Click and drag in the Top or Perspective viewport to create a RailClone icon.
RailClone uses its local coordinate system to determine the array's axes, so the orientation of the RailClone object is important. Here is how the local axes of the RailClone object looks:
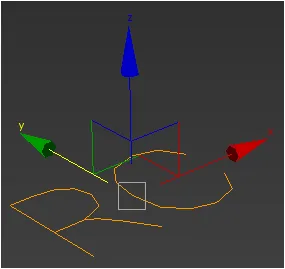
1D Arrays are constructed along the X axis while 2D arrays use the X and Y axes. The axes of the source geometry will always be aligned with the RailClone objects local axes (we discuss this in more detail in the Intermediate Guide). For example, in most cases you would want a fence's verticals to align with the Z axis, so you should create the RailClone icon in the top or perspective viewport :
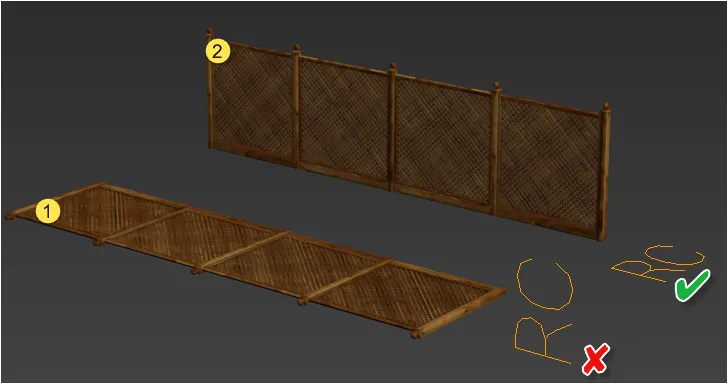
1. In this example the RailClone object was created in the left viewport. This is incorrectly oriented for a fence style, though may be correct for other styles such as wall claddings that use a vertical alignment. 2. In this example the RailClone object was created in the top viewport, the RailClone object is oriented correctly for this style.
If you find the alignment is incorrect you can simply rotate the RailClone object to the orientation you require and then reselect the base object(s).
Step 3 - Load a preset from the library
You now have a Base Object and an empty RailClone object. The next step is to load a style. To open the Library Browser and load a preset follow these steps:
-
Make sure the RailClone object is still selected and open the Modify Panel.
-
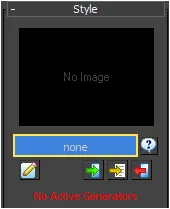
Open the Style rollout. Click on the Open RailClone Library Browser button, this will currently say "none", but will display the name of the style once it has loaded.
-
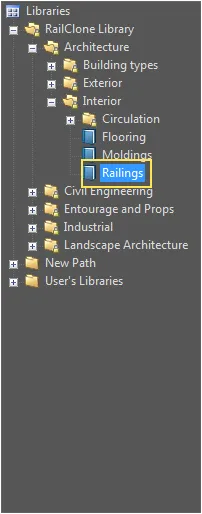
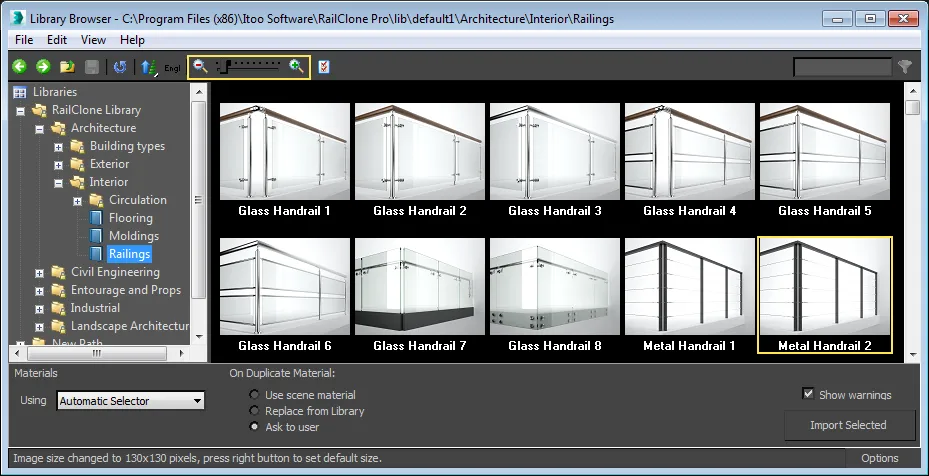
The library browser will open. Use the Tree Navigator in the left of the window to locate a library. In this example we'll use a Railings library which can be found by going to RailClone Library > Architecture > Interior.
-
When you click the library's name, the items grid will update to display thumbnail previews of the contents. To change the size of the previews you can use the zoom slider found in the Toolbar. Select Metal Handrail 2.
-
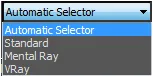
Ensure the Using option is set to Automatic Selector. When this is active, RailClone auto-detects the active renderer and merges the most appropriate material. If you'd prefer to manually specify which material to merge, use the drop-down menu to select the correct renderer. The built-in libraries include materials Standard, Corona, Arnold, and V-Ray renderers.
-
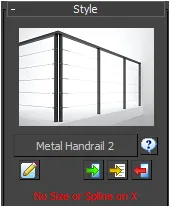
Next click Import Selected or double-click on the thumbnail. The Library Browser will close and the Style roll-out is updated with the name and preview image of the preset.
Step 4 - Add the spline as a Base Object
You'll notice there is a red error message displayed in the style rollout. This is because we have loaded the rule-set for this style, but we haven't yet specified the path for it to follow. To do this:
-
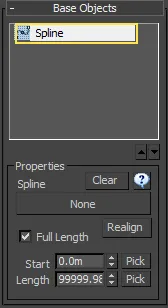
Open the Base Objects rollout. Here you'll find an option to pick a spline from the scene. (This style only uses 1 spline but others may use more.)
-
Select the Spline case Object and click on None Buttom then select the spline in the scene created in step 1, above.
-
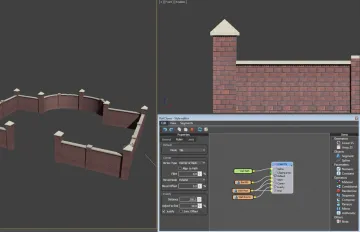
The railing style now generates geometry along the spline. Note that a post is added at each vertex except the one in the middle of the curve.
Step 5 - Edit Parameters
Many presets have additional editable parameters that are unique to the style. In this example the height of the railing and the number of wires are adjustable. Follow these steps for an example of how to edit these values:
-
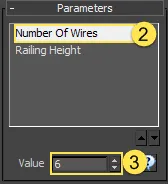
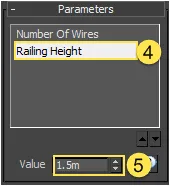
With the RailClone object selected, open the Parameters rollout in the Modify panel.
-
Select the parameter called Number of Wires
-
Change the value from 4 to 6.
-
Select the Railing Height parameter.
-
Change the value to 1.5m.
Though we have presented this process as a sequence consisting of 5 steps, one of the great advantages of RailClone is that a style, its parameters, segments, and base objects can be edited at any time and in any order, and the object will update automatically. For example, you can easily edit the spline path, perhaps lengthening a section and adding a new corner, and the geometry is recalculated and updated in real-time. Also, for styles that share the same number of Base Objects, it's possible to replace the existing style with a new preset from the library, and it will be automatically be applied to the currently assigned spine, without needing to reselect it from the scene.
Exercise: Display Settings
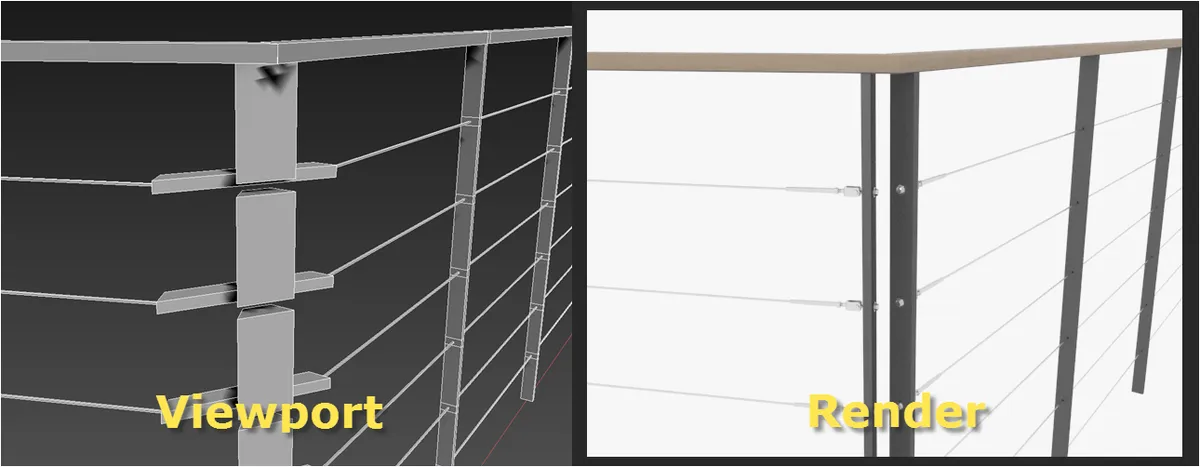
If you look closely at this style in the viewports you'll notice that the geometry does not match the thumbnail preview, in fact It appears to be created using much more primitive geometry. Don't fear! This not an error, but is because the original geometry has been replaced with simplified boxes using one of RailClone's two adaptive display modes. These are designed to keep viewport navigation as fast and interactive as possible, while allowing you to render scenes with huge polygon counts. RailClone automatically switches to this display mode when the face count of the object exceeds a set value, by default 100,000 faces.
If you render the view you'll see that despite the representation in the viewports, the full geometry is always used at render-time, without any need for user-intervention.
The second adaptive display mode allows you to display the geometry as a point-cloud. This mode is useful if you need a more accurate representation of the geometry in the viewports, and especially useful while you're designing complex high-poly styles. To switch on Points-Cloud display mode, follow these steps:
-
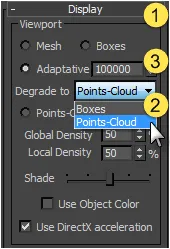
With the RailClone object still selected, open the Display rollout.
-
Click on the "Degrade to" drop-down list, and select Points-Cloud.
-
From this menu you can also change the face threshold value that the object must exceed in order to trigger a simplified display mode. To do this enter a new value on the Adaptive value box.
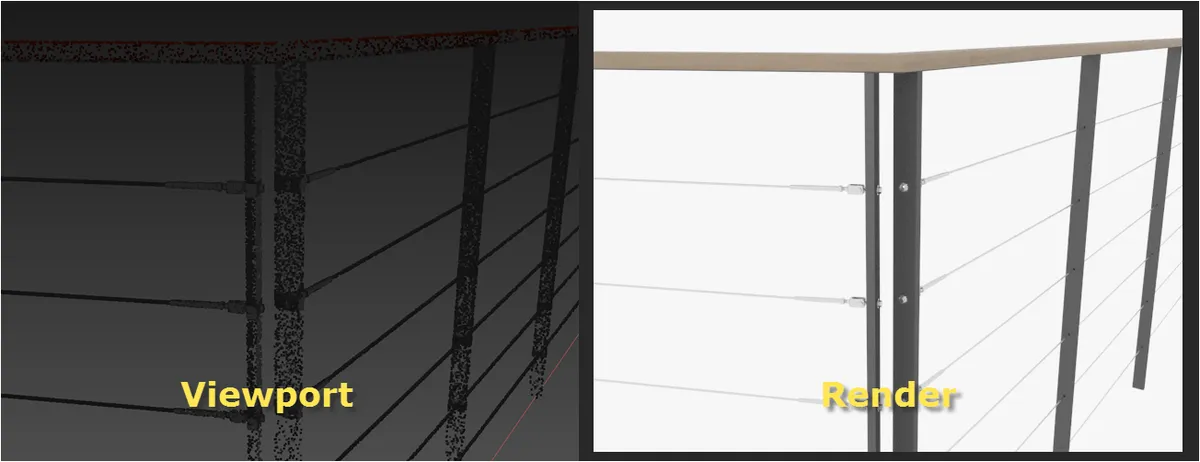
The railing will now be displayed in the viewport as a points-cloud, but if you render you will see that the full geometry is used at render-time, again without any need for user-intervention.
It is also possible to set the display mode manually, irrespective of the number of faces. To do this, open the Display rollout and select one of these 3 options:
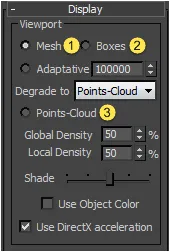
- Mesh turns off the preview modes and displays the full mesh. Often useful when first creating a style but be careful using this mode on large objects as huge poly-counts can easily be created that slow down performance.
- Boxes forces RailClone to display geometry as boxes.
- Points-Cloud forces RailClone to display geometry as a points-cloud.
What to do if RailClone exceeds its limits
Occasionally, when creating a very large RailClone object, you may get a warning telling you that the maximum number of segments has been reached.
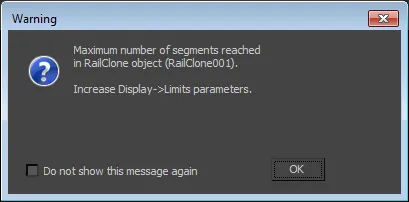
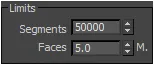
This is because RailClone imposes a segment and face count limit to prevent users from accidentally creating RailClone objects so large they risk crashing 3ds Max. This limit can be increased by going to the display rollout and adjusting the Segments and Faces values.
When calculating the face count, instanced geometry is not taken into consideration.
Related Tutorials
The first part of this tutorial includes a section on loading styles from the library browser that may provide a useful recap for this chapter.
Part one of this tutorial explains how to load a metal railing preset from the library and apply it to a spline Base Object.
For more information please see the Customizing the Library . Display Settings . Parameters . Path Base Objects , and Surface Base Objects sections of the online documentation.