SplineOffset
Overview
SplineOffset is a modifier for 3ds Max that creates multiple clones of splines with the option to incrementally increase or decrease offset, translation, and rotation. In many ways it is similar to 3ds Max's built-in array tool combined with a spline offset function, but with two major benefits: Firstly SplineOffset is fully parametric, so you can change the number of clones, the size of the offsets, and their distribution at any time. Secondly, SplineOffset is able to heal overlapping splines so that they form one continuous path, a feature that's missing from Max and opens up the plugin to a huge range of applications. Other features include the ability to set, offset and sequence material IDs; a choice of 5 end types for open splines; and the ability to specify 3 types of corner bevel. You can even add multiple SplineOffset modifiers to create 2D and 3D arrays, each with their own settings.
Features
- Procedurally clone and offset any spline.
- Increment translation, rotation and offset.
- Fully non-destructive. Edit settings at any time.
- Automatically heals intersecting splines caused by the offset operation.
- Set, increment and create patterns of Material IDs on cloned splines.
- Choose between 5 end types: Butt, Square, Round, Closed Spline or Closed Polygon.
- Choose between 3 bevel types: Square, Chamfer, or Round.
- Multiple SplineOffset modifiers can be used to create sophisticated nested effects
- Compatible with Max 2013 and above.
Tutorial
Procedures
To incrementally offset, translate or rotate parallels
-
Add a SpineOffset Modifier
-
Use the # Parallels value to determine how many times the base spline is cloned
-
Use the Translation values to incrementally Translate each parallel. There are separate values for X, Y and Z axes.
-
Use the Rotate values to incrementally Rotate each clone. There are separate values for X, Y and Z axes.
To create parallels inside, outside or inside and outside a closed spline
 Clones outside the source spline
 Clones inside the source spline
 Clones both side of the source spline
- To create parallels outside a closed spline, use a positive Distance value.
- To create parallels inside a closed spline, change End Type to Closed Line and enter a negative Distance value.
- To create parallels inside and outside a closed spline, change End Type to Closed line, enable Double Sided Offset and enter a positive Distance Value.
To fix a material ID
- Add a SplineOffset modifier
- Increase # Parallels and incrementally Translate, Rotate or Offset splines as described above.
- Change Material ID mode to Fixed. Enter a Material ID value to be used for the new splines. Note that the original spline is unaffected and that if multiple values are entered, only the first will be used.
To Increment material IDs
- Add a SplineOffset modifier
- Increase # Parallels and incrementally Translate, Rotate or Offset splines as described above.
- Change Material ID mode to Increment By. Enter a value by which the material ID for each spline will be incremented, starting with the material ID number on the source path. Note that if multiple values are entered, only the first will be used.
To Sequence material IDs
-
Add a SplineOffset modifier
-
Increase # Parallels and incrementally Translate, Rotate or Offset splines as described above.
-
Change Material ID mode to either Sequence by Segments to create a pattern of material IDs based on the segments of the spline Sequence by Spline to create a pattern of material IDs based on the parallels
-
Enter a comma separated list to define a repeating sequence.

To auto-heal overlapping Splines
 SplineOffset can auto-heal splines that overlap
 The same spline with the auto-healing feature disabled
- Add a SplineOffset modifier
- Increase # Parallels and incrementally Translate. Rotate or Offset splines as described above.
- Splines from the same sub-splineare healed when the offset operation causes them to overlap
- To heal splines for different Sub Splines, enable Heal Intersecting Splines.
To set the pivot point
- Select the Spline object, remove any SplineOffset modifiers that are already present
- Go to the Hierarchy Panel and enable Affect Pivot Only. Move the Pivot to its new position and orientation.
- Disable Affect Pivot Only. Use the Reset XForm tool found in the Utilities Panel
- Add SplineOffset modifiers as normal. They will now use the new pivot position for translate and rotate operations.
To Offset open splines
- Add a SplineOffset modifier to an open spline
- Increase # Parallels and incrementally Translate. Rotate or Offset splines as described above.
- Change the End Type to either Open Butt. Open Square or Open Circle
To Offset splines that are not planar
- Add a SplineOffset modifier
- Increase # Parallels and incrementally Translate. Rotate or Offset splines as described above.
- Change Mode to 3D
The 3D mode is able to retain the position of source splines when they are flat on a single plane, however you should be aware that the algorithm is less effective at auto-healing, especially when using negative distance values, and the options for End Type and Bevel are also not available.
Interface
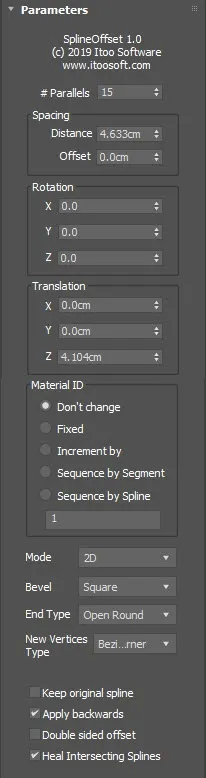
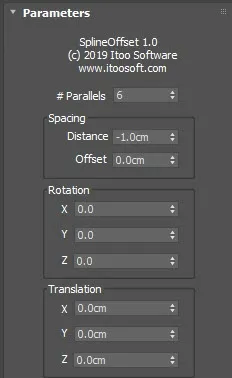
# Parallels
Specifies the number of times the input spline is duplicated.
Spacing
Controls the incremental offset of the cloned splines using two parameters
-
Distance sets the offset distance between each parallel
-
Offset Allows you to modify the offset value for just the first parallel.
Rotation
Incrementally rotates splines using the stepped values set for the X, Y, and Z axes.
Translation
Incrementally translates the splines using the values set for the X, Y, and Z axes.
Material ID
Allows the user to control the material IDs on cloned splines. Five options are available
- Don't Change parallels retain the Material ID(s) assigned to the source spline
- Fixed Sets a new value for the parallels. The new Material ID is set using the input list at the bottom of the Material ID group UI. Note that in the event of a comma separate list, only the first entry is used for this mode.
- Increment by increments the Material ID on each parallel by the first value stored in the input list
- Sequence by Segment reates a pattern of material IDs using a comma separated list. The modifier then loops through these, moving to the next material ID in the sequence for each spline segment.
- Sequence by Spline creates a pattern of material IDs using a comma separated list. The modifier then loops through these, moving to the next material ID in the sequence for each parallel
Mode
SplineOffset includes two algorithms for performing offset and healing operations: 2D Mode and 3D Mode.
 2D Mode
 3D Mode
2D Mode
The 2D algorithm provides the most robust healing solution and has two additional options to define how the parallels are created by setting their Bevel Type and End Type. It also has the ability to auto-heal splines that are being generated by different sub-splines Though more featured, 2D mode will always flatten all splines on the Z axis before performing any further translation rotation or offset operations.
3D Mode
3D mode lacks the Bevel Type and End Type features of 2D mode and has a less robust auto-healing algorithm, but it will retain the spline's position and orientation and attempt to make appropriate clones.
Bevel Type
Choose from 3 types of bevel type for intermediary corners: Square. Round or Chamfer
 Bevel Type = Square
 Bevel Type = Chamfer
 Bevel Type = Round
End Type
Choose from 5 options for the way the ends of spline are terminated: Closed Polygon. Closed Line. Open Butt. Open Square or Open Round.
 End Type = Closed Polygon
 End Type = Closed Line and Double Sided Offset = On
 End Type = Open Butt
 End Type = Open Square
 End Type = Open Round
New Vertex Type
Sets the type used when new vertices are created, particularly useful on curved Splines. This setting can be used with the Conditional nodes and/or Corner settings in RailClone to help differentiate the original vertices in the source spline to the ones added by the SplineOffset modifier.
Keep Original Spline
When enabled, the source spline is retained. When disabled the source spline is removed.
 Keep Original Spline = Off
 Keep Original Spline = On
Apply Backwards
When enabled, translation and rotation operations are performed backwards, i.e. from the last parallel to the first. When disabled, translation and rotation operations are performed in the order from the first parallel to the last.
 Apply Backwards = Off
 Apply Backwards = On
Double Sided Offset
When enabled, splines are created inside and outside the source spline. When disabled, splines are only on one side of the source spline.
 Double Sided Offset = Off
 Double Sided Offset = On
Heal Intersecting Splines
When enabled intersecting parallels from different sub-splines are auto-healed. When disabled, parallels from different sub-splines are not healed and simply overlap.
 Heal Intersecting Splines = Off
 Heal Intersecting Splines = O
Installation
SplineOffset officially supports 3ds Max 2022 to 2026 (with unofficial support from previous versions).There is no automatic installer application, so you will need to install SplineOffset manually by following these steps:
- Download SplineOffset from either the ITOOSOFT Website or Autodesk App Store .
- Extract the downloaded ZIP.
- Once extracted you will find a folder for each supported version of 3ds Max. Open the appropriate plugin folder and select SplineOffset.dlm.
- Copy SplineOffset.dlm to 3ds Max's plugin directory, usually located at C:\Program Files\Autodesk\3ds Max#####\Plugins