Creating your first scatter
ForestPack Pro is a popular plugin for 3ds Max that enables you to create large distributions of objects in your scenes. It's often used for tasks like creating forests, distributing ground cover, generating cities, and more. ForestPack was originally created in 1999, and in its many years of development it has evolved to meet the needs of artists in architectural visualisation, animation, games and VFX. The downside of such a powerful tool is that it can be bewildering for new users, but really you can get started in just a couple of steps by using presets, as follows.
Get started using presets
-
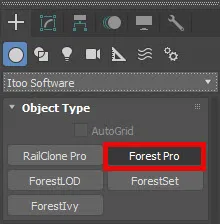
Navigate to the "Create" panel on the right-hand side of the screen. Select iToo Software from the drop-down list and then choose ForestPack.
-
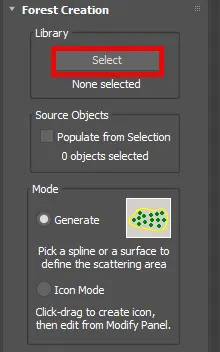
Click on the Library > Select button to open the library browser.
-
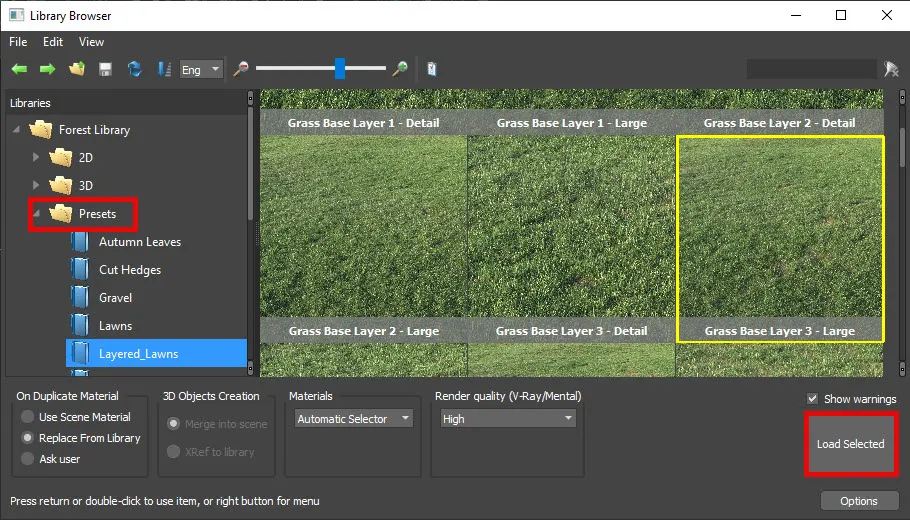
Pick a preset from the library and click Load Selected. These are ready-made scatters that include all the geometry, materials and distribution settings. All you need to do is to tell it where to scatter.
-
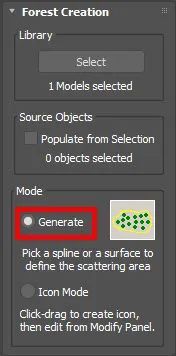
Pick a surface or a closed spline. ForestPack will load the preset and automatically assign it to the selected area.
Create a custom scatter
As you get more comfortable with ForestPack you'll want to create your own scatters, you can do this using just a handful of settings found in only 5 key rollouts:
- Add any items that you want to scatter to the list found in the Geometry rollout.
- Add any surfaces or terrain on which you wish to scatter using the Surfaces rollout.
- Further, refine the parts of the scene where you would like to scatter by adding splines to the Areas rollout.
- Control the pattern and density of the scatter using the Distribution rollout.
- Finally, randomise the rotation, translation and scale using the Transform rollout
Here is a straightforward guide that looks at each of these in more detail.
Step 1: Prepare Your Scene
To create a scatter, you will need something in your scene to define the area. You could either import or create a terrain over which you wish to scatter objects; or you could start with one or more simple closed splines; or combine the two.
Step 2: Initialize ForestPack Pro
Navigate to the Create panel on the right-hand side of the screen. Select iToo Software from the drop-down list and then choose ForestPack. You will notice your cursor has changed, indicating that the plugin is ready to place a scatter object.
Step 3: Create the Forest Object
Click on the scene on the terrain or a spline. This action will create a new ForestPack object and automatically assign it in the Areas or Surfaces rollouts.

Step 4: Add Geometry to Scatter from the library
In the Geometry rollout, you can specify what objects you want to scatter. You can add multiple custom objects or use the library that comes with ForestPack Pro. To add an object from the library, follow these steps. Click on the + button (a) to add a new item to the geometry list. Click on the Library button (b). Pick a 3D object from the library and click Load Selected. These are individual objects that allows you to add your own distribution settings. You can add more objects as required simply by repeating the previous two steps.
Step 5: Add Geometry to Scatter from the scene
Alternatively, you can add geometry to scatter by selecting it from the scene. To do that click on the + button (a) to add a new item to the geometry list. Pick an object from the scene. The name of the object picker button will be updated (c). You can add more objects as required simply by repeating the previous two steps.
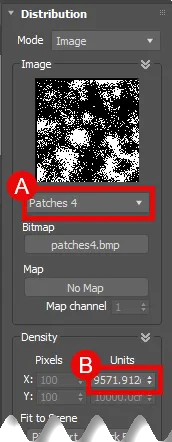
Step 6: Adjust Distribution Settings
To control the spacing, count, and arrangement of your scatter objects, go to the Distribution rollout. Here you can select different distribution patterns (a) and specify how dense or sparse you want your scatter objects to be using the Density parameter (b) .
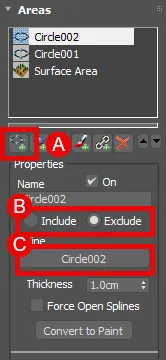
Step 7: Define additional Areas
After creating the object, you might want to refine where your scatter items should appear by adding additional areas. Go to the Areas rollout and click on the Add Spline button (a). Next, pick an object from the scene using the object picker button (c). Set the mode to Include or Exclude to add scatter items or remove them (b).
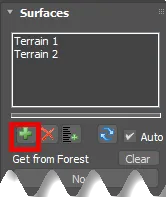
Step 8: Define additional Surfaces
You can also add one or more additional surfaces. These are handled by a separate Surfaces rollout. To add a surface, click on the Add Surface button and pick a terrain from the scene.
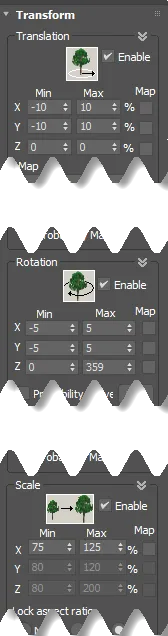
Step 9: Add Randomisation
ForestPack Pro offers several other rollouts like 'Transform', 'Animation', and 'Material' that let you adjust rotation, scale, animation phase, and material assignment, among other settings.
This should give you a basic scatter setup using ForestPack Pro in 3ds Max. The plugin offers a wide range of advanced features that allow for greater control and more complex scatters, but this guide should be sufficient for creating simple scatters as you become more familiar with the software.