Effects Library
Overview
The Effects Browser allows you to easily navigate the effects that ship with ForestPack. It also allows you to import and manage your own effects or effects obtained from a third party. Using the effects browser makes it fast and simple to quickly add additional functionality to ForestPack exactly when you need it.
Effects are saved in .eff files. These can be created using the Export feature of the Effects Editor, see this feature's reference for more information.
Procedures
To open the Effects Browser
- Go to the Effects rollout.
- Click on the button to add a new empty effect.
- Click to open the Effects Browser.
To load an Effect using the Browser
-
Open the Effects Browser.
-
Use the Effects navigator to select the Effect you wish to use
-
Read about the effect in the description pane to see instructions for its use. For extra information you may be able to click on the Click For Additional Help button to open our online documentation.
-
Click
-
Adjust the properties if necessary from the Effects rollout.
To access and load user and 3rd part effects from the Effects Browser
-
Choose User Path from the drop-down list found above the Effects Navigator.

-
Select an effect from the effect navigator.
-
Click
To create a Category in user Effects Library
- Right click in the Effects Navigator
- Click

- An add category dialog will open, enter a name and click OK.

To add a new Effect to the User library
-
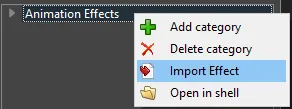
Right-Click on a Category and select Import Effect.
-
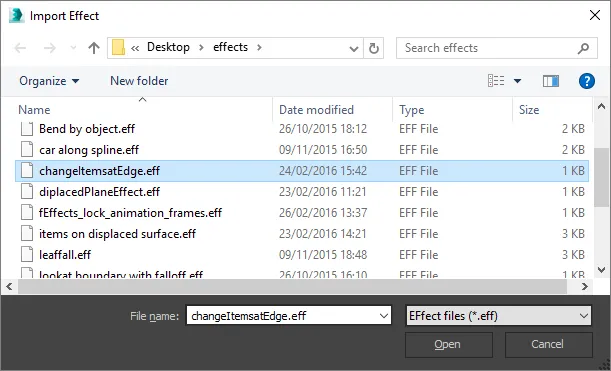
Select an .eff file and click Open.
-
The .eff file will be imported and saved to your Effects Directory.
To delete an Effect from the library
-
Select the effect you wish to delete from the Effects Navigator.
-
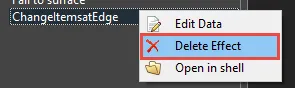
Right click and select Delete Effect.
To open the Effect's save location in Windows Explorer
-
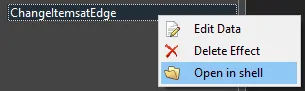
Right-click on an effect and click Open in shell.
To add information about an effect
-
Select an effect from the Effects Navigator.
-
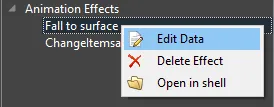
Right click and select Edit Data.
-
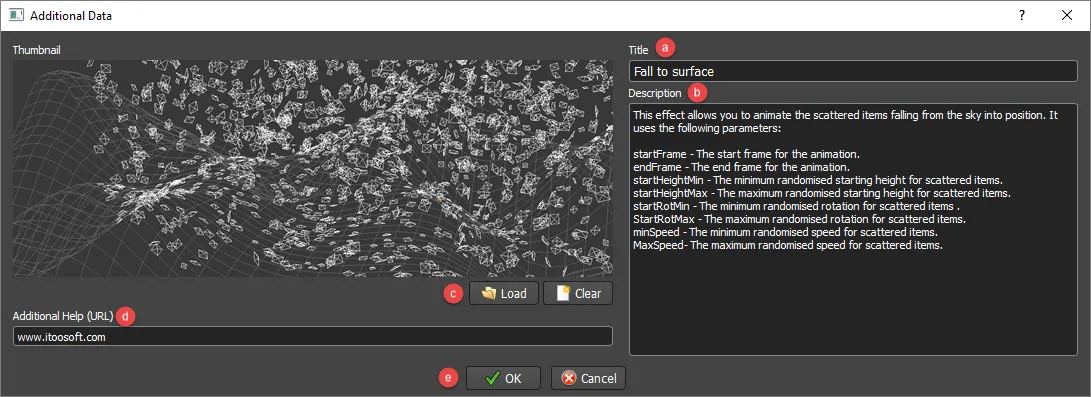
The Edit Data window will open.
-
Enter a name for the effect in the title field (a). If this field is left blank the file name will be used.
-
Enter a description (b). This contains any instructions and additional information a user requires in order to use your effect. (optional)
-
Click Load to add a thumbnail (c). The plugin supports files of the type png, jpg, and .xpm. This image is displayed underneath the description in the effects' browser. (optional)
-
Additional help is used to provide a link to a website (d). This could be more informtation about the effect, the author or anything else you feel is helpful. (optional) 8. Click OK.
Though the Effect Browser allows you to import, delete and categorise your effects the plugin is actually just reading the directory structure of the user's effects folder. This means that it's easy to create new categories and organise effects using any file manager. By default, user paths are saved in
C:\Users\username\Documents\ForestPack\effects
Interface
Interface components
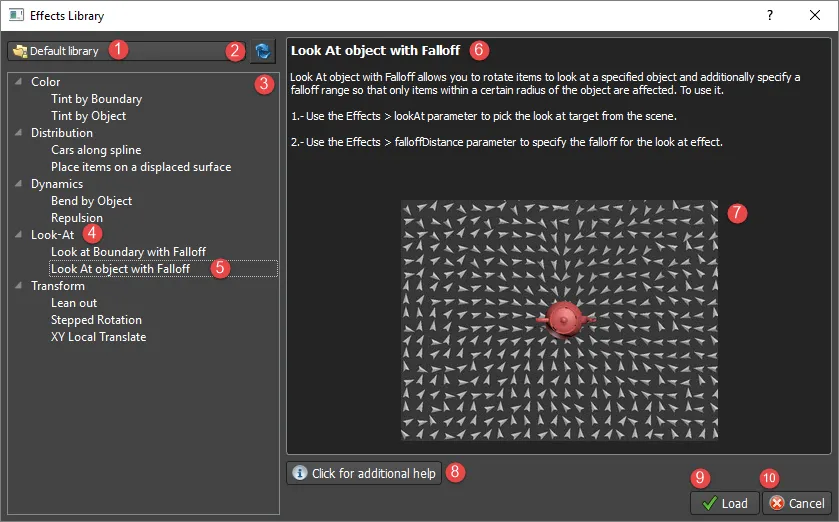
- Library Menu. drop down list to Select the library. By default, you have two libraries, the Default library for built-in effects and a User's library for your own effects.
- Refresh. click to refresh the effects' navigator. This is usefully if you've made changes to the library manually in a file manager, and you'd like to see these updates in the Effects Browser.
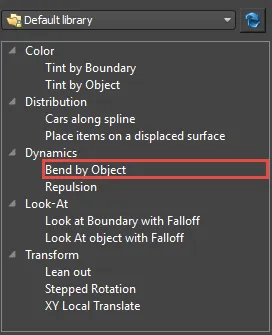
- Effects Navigator. displays a tree view of your selected library
- Category. category is a way of organising your effects. Categories can be nested.
- Effect. An individual .eff file. Click to see more information about the effect.
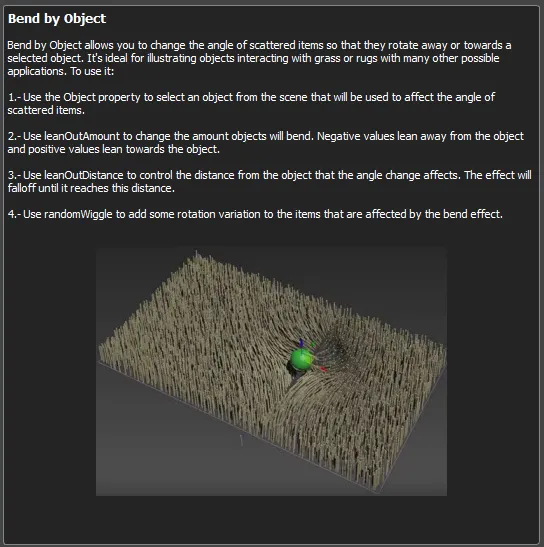
- Description. Shows a text description and instructions of the selected effect.
- Preview Image. An image to illustrate the selected effect
- Click for additional help. Click this button to go to online help for more information about the selected effect. For ITOOSOFT effects this takes you to our documentation server.
- Load. Click this button to load the selected effect.
- Cancel. Click this button to close the Effects Browser without making any changes.
When editing the user library you can right-click in the Effects Navigator to perform different functions. Depending on whether you click on a Category or an Effect you'll get the following menus:
Category menu
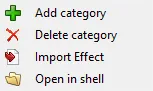
- Add category. creates a new category in the selected location.
- Delete category. deletes the current category and its contents.
- Import Effect. import an .eff file into the current category.
- Open in shell. opens the directory of the selected category using your default File Explorer.
Effects menu
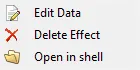
- Edit Data. Opens the Additional Data menu used to include a title, description, preview image, and URL.
- Delete Effect. Deletes the selected effect.
- Open in shell. Opens the directory of the selected effect using your default File Explorer.
Additional Data menu
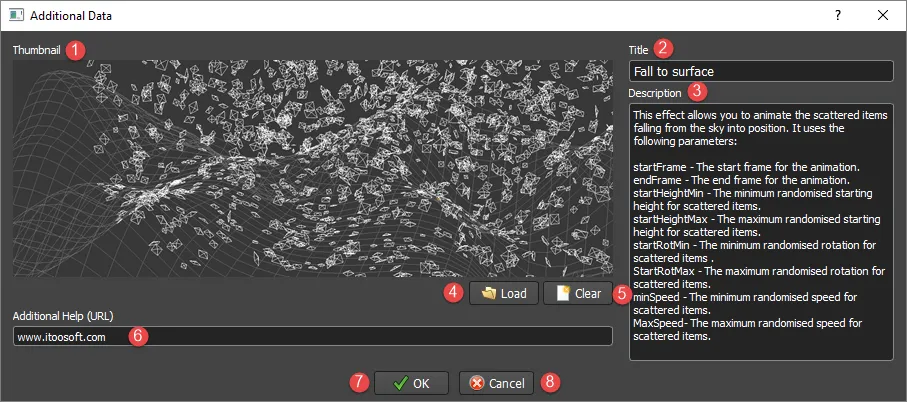
- Thumbnail. displays a preview of the selected effect. The browser does not rescale images, so it's recommended to save them in a size that's appropriate.
- Title. the name of the effect to be displayed in the Effects Navigator. If you leave this field blank the file name will be used.
- Description. add additional information about the effect such as a description and instructions for use.
- Load. click to select a preview image file in the format png, jpg, or xpm. The image is encoded in the .eff file so there's no need to include it if you share your files.
- Clear. click to remove the current preview image.
- Additional Help (URL). used to add a URL that can provide additional online help or information about the author.
- OK. Click OK to save changes to the effect and return to the browser.
- Cancel. click Cancel to return to the browser without saving any changes.