Create panel
Overview
To create a new Forest Object you have three options. You can either start by clicking on an area such as a surface or a spline, place individual objects by using Item Editor mode, or create an empty Forest Object so that you can configure all the settings later.
Procedures
To pick a model or preset from the library
-
Go to the "Create" tab in the Command Panel and choose iToo Software from the dropdown list.
-
Click on the ForestPack button.
-
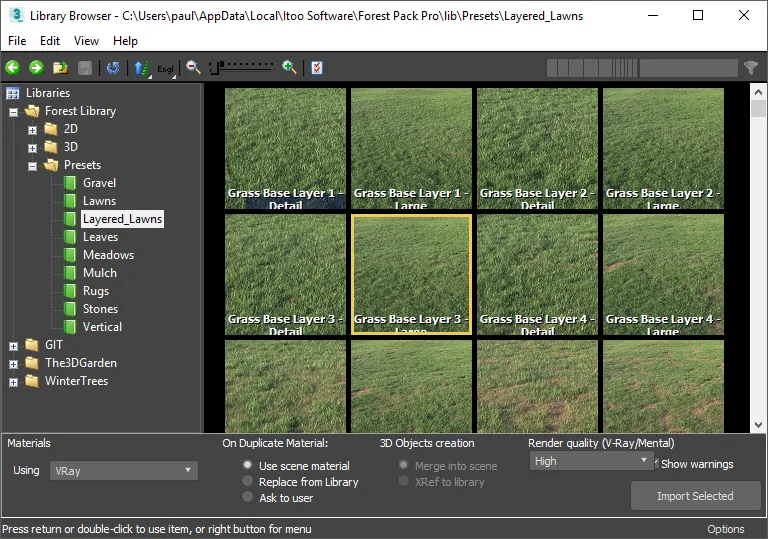
Click Library > Select to open the library browser
-
Pick a preset and click Import Selected.
To create a Forest Object using a Spline or Surface
- Go to the "Create" tab in the Command Panel and choose iToo Software from the dropdown list.
- Click on the ForestPack button.
- Check Mode > Generate.
- Click on a surface or spline in the scene to pick it as the first area.
- Switch to the Modify tab for any subsequent edits.
To create a Forest Object that scatters the selected items
-
Select the objects you wish to scatter.
-
Go to the "Create" tab in the Command Panel and choose iToo Software from the dropdown list.
-
Click on the ForestPack button.
-
Check Mode > Generate or Icon Mode.
-
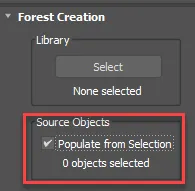
Enable Source Objects > Populate from Selection.
-
Click on a surface or spline in the scene to pick it as the first area or create an icon depending on the creation mode.
-
Switch to the Modify tab for any subsequent edits.
To place individual objects
- Go to the "Create" tab in the Command Panel and choose iToo Software from the dropdown list.
- Click on the ForestPack button.
- Check Mode > Icon Mode heck Mode > Icon Mode. Click and drag in the scene to create a ForestPack icon
- Switch to the Modify tab and add objects to the GeometryList.
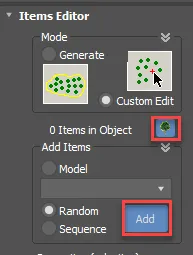
- Go to the Items Editor rollout and enable Custom Edit mode
- Click on the Tree icon to enter the Tree sub object level
- Select Add and the click in the scent to add objects
To create a Forest object with no item placement
- Go to the "Create" tab in the Command Panel and choose iToo Software from the dropdown list.
- Click on the ForestPack button.
- Check Mode > Icon Mode. Click and drag in the scene to create a ForestPack icon
- Switch to the Modify tab for subsequent editing.
To select all the items in the scene used by a Forest object
- Select a Forest object
- Right-click and choose Select all ForestPack Dependencies from the quad menu.
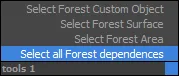
There are also options to select individual custom objects, surfaces, and areas
Interface
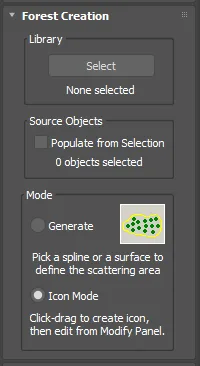
Library
From the Create panel you have the option to load models or a preset from the library. Just click on the Select button to open the Library Browser .
Source Object
Fill from selection allows us to choose which objects will be used
Mode
Generate
Enables you to create a new ForestPack object by picking a Spline or a Surface from the scene. This will be automatically added to the Areas or Geometry list. Subsequent edits should be done from the Modify panel.
Icon Mode
Enables you to create an empty ForestPack object click-dragging an icon in the scene. The resultant ForestPack has no areas assigned (but may contain geometry if you used the Library option). Subsequent edits should be done from the Modify panel.