How to align, overlap and transform geometry
In this section we'll look at how to adjust the padding, alignment, and transform settings of a segment. This can be useful where you wish to reuse a segment multiple times but with different properties, add randomisation to the transforms, or adjust the spacing between adjacent segments.
Transforming Segments
Fixed Transforms
Once a segment is added to RailClone it's possible edit its rotation, translation and scale values from the Properties Panel. To access these options:
- Select a Segment node (
 ).
). - Go to the Properties Panel.
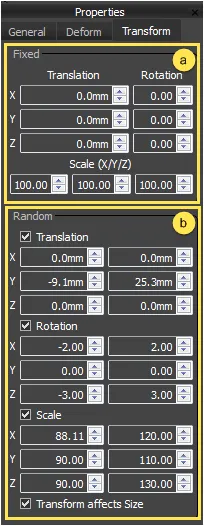
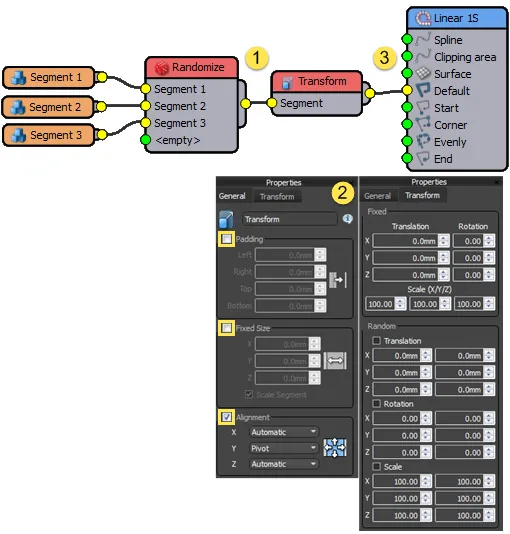
- Go to the Transform tab. In the Fixed group (a) you'll see there are parameters that enable you to translate, rotate and scale the segment's geometry. Underneath this, the Random group (b) allows you to randomise these properties with in a range. You can try out these parameters by following the exercise in the next section.
Exercise: Randomising Transforms
In this section you'll learn how to randomise the position, rotation and scale of segments using roof slates as an example. To follow this procedure, download and open slate_tiles.max .
-
With slate_tiles.max open, select the RailClone object called rc_slates. the slate geometry is quite high poly so In the viewports this RC object is using Box display mode to help maintain viewport speed. As you can see the slate pattern currently has no variation.
-
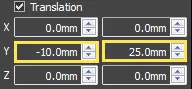
we can start adding some irregularity to this by randomising the tile's position. Open the Style Editor and select the Segment node called Slate_002. Go to the Properties panel select the Transform tab and turn on Translation in the Random group. Each axis can be randomised independently by entering a Minimum and Maximum value, measured in scene units. In this example we'll enter a value of -10mm for the Translation > Y Min value, and a Y Max value of 25mm.
-
To randomise Rotation, activate Transform > Random > Rotation and enter Minimum value of -2 and Maximum value of 2 degrees the X and Y axes.

-
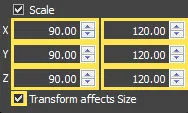
To randomise Scale, activate Transform > Random > Scale and enter Minimum value of 90 and a Maximum value of 120 for the X. Y and Z axes.
-
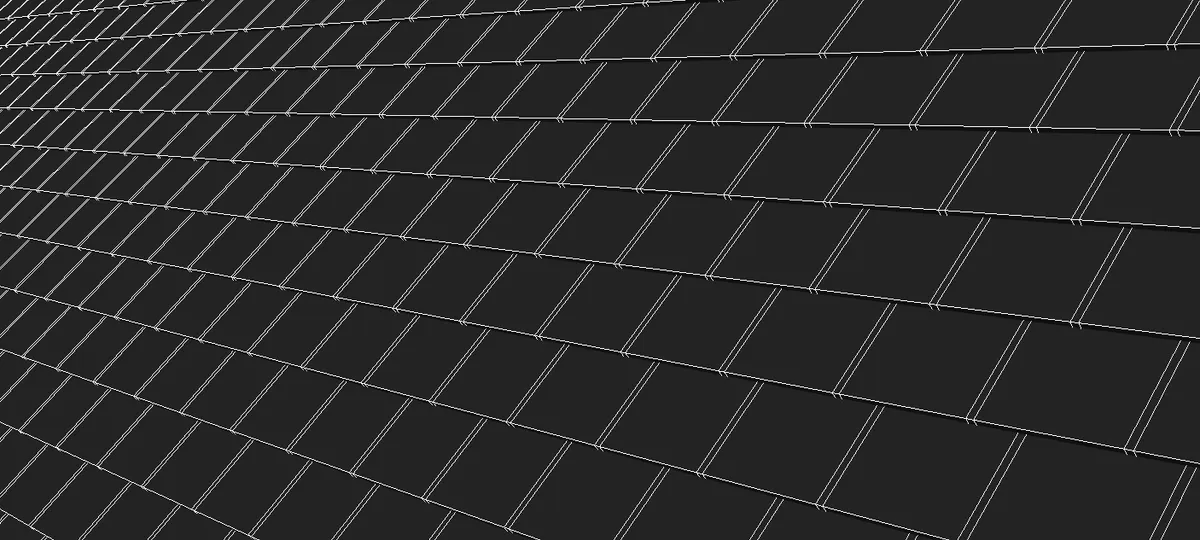
For this style these changes in transform settings should affect the position of adjacent segments. To do this make sure that Transform Affects Size is left On. If you would like to use the size of the original segment before transforms, turn this setting off. The image below illustrates the render before and after randomisation.
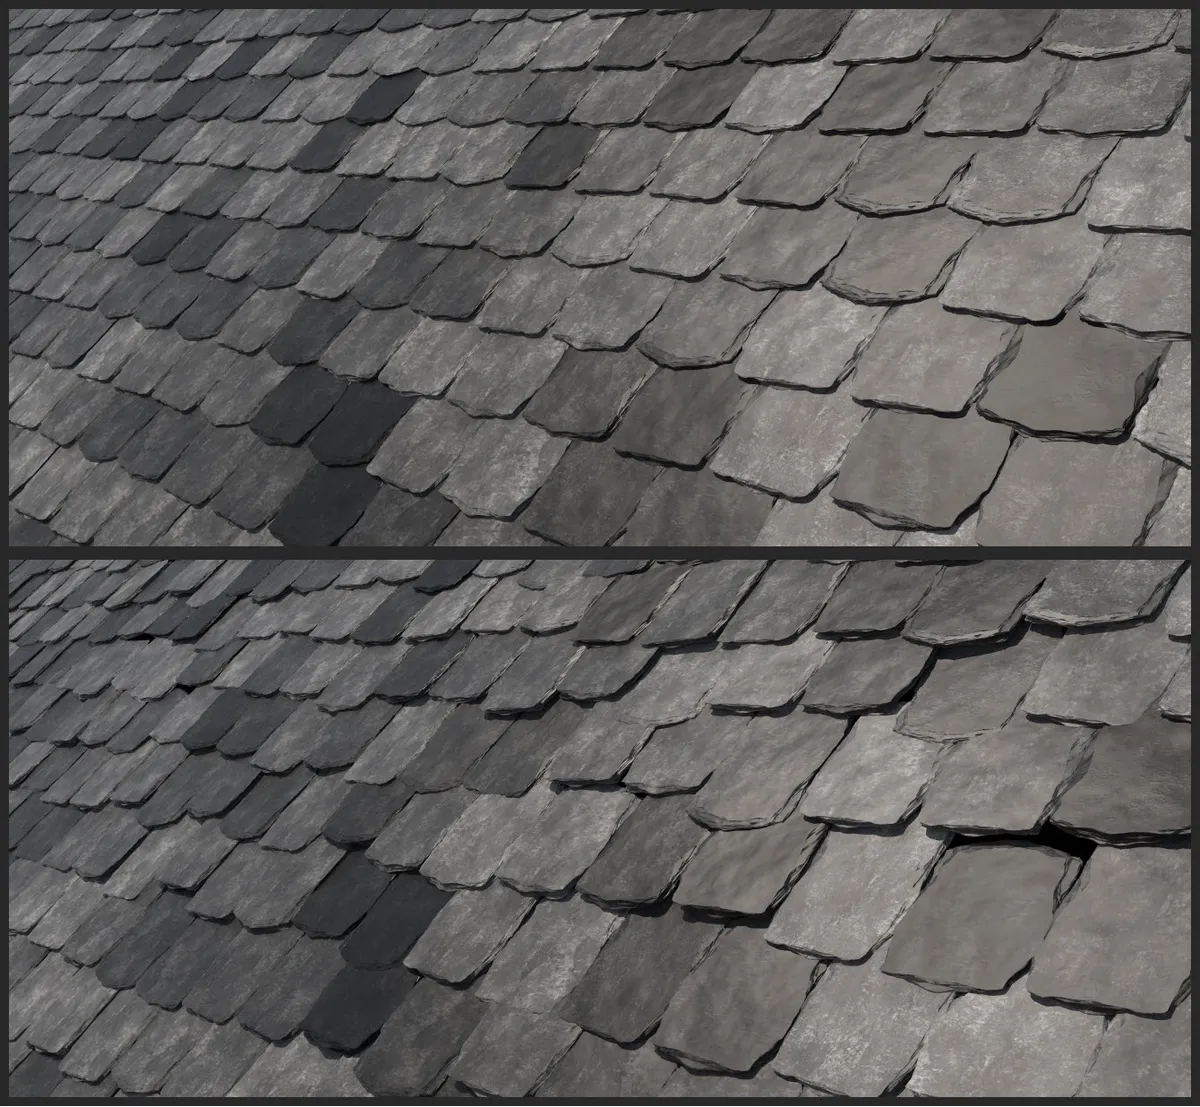
Top: no transform randomisation. Bottom: with transform randomisation (exaggerated)
The Transform Operator
Instead of adjusting the transform values from the Segment node's properties, it is also possible to use a Transform operator to access the same settings.This can be useful if you want to change multiple segments that are attached to a Sequence, Compose, Randomise, Selector, or Conditional operator. Using the Transform operator can save you from having to enter the same information multiple times and makes updating your styles much quicker and easier. The basic procedure for using the Transform operator is as follows:
- Wire a node to the Transform operator's input.
- In the Transform node's properties, activate any settings you wish to use by clicking on the appropriate check-box. This will override the values set in the Segment's own properties.
- Connect the Transform operator's output to a generator or another operator's input.
Segment Padding
Each segment has a length and height extracted from the bounding box of the source geometry. This dimension is used to control how the segment will be positioned alongside others in the array. For some geometry this may produce undesirable results, as the bounding box will always be determined by the largest part of the mesh. For example, load the segment_padding.max exercise file. In this scene is a relatively simple pipe preset that uses bolted collars for the corner and evenly inputs. If you look closely at the style you'll notice there are some unwanted gaps:
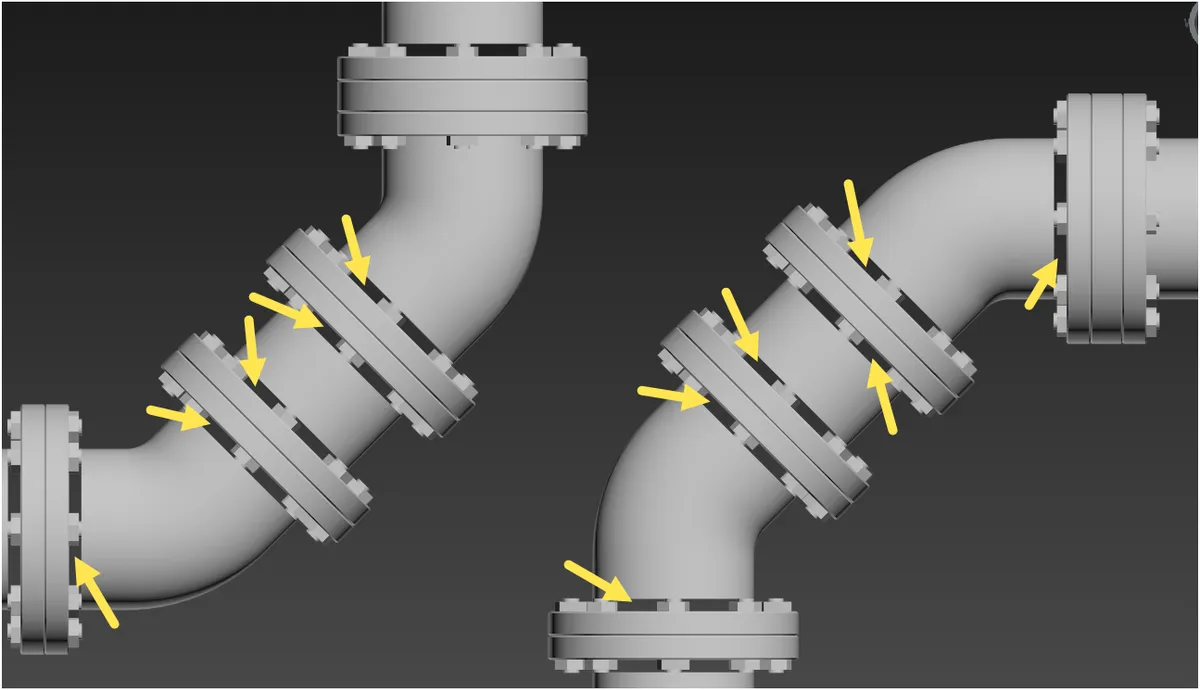
Unwanted gaps in the Pipe style
This is caused by the bolts, as they define the size of the bounding box, pushing the pipes away from the connector and causing a gap:
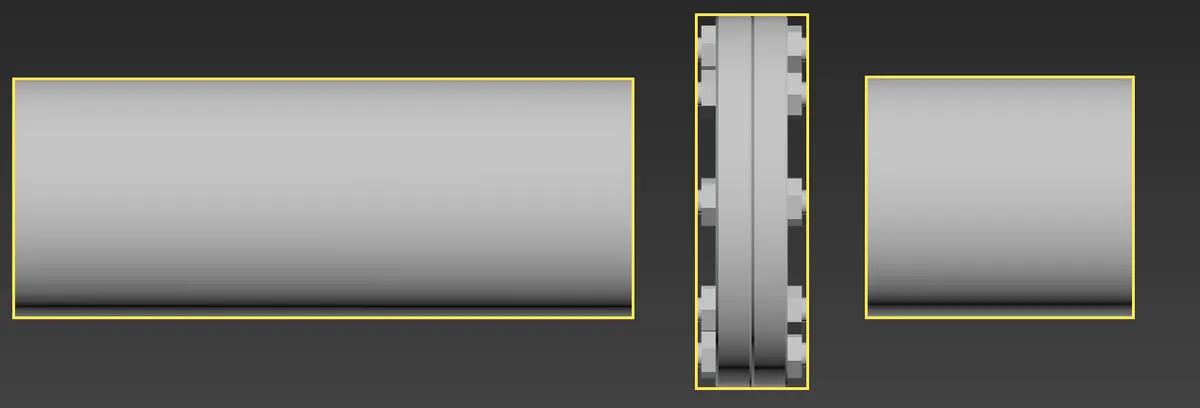
The 3 segments used in the Pipe style and their bounding boxes (in yellow). Note how the bolts will prevent the pipes from properly connecting to the collar.
Fortunately RailClone includes a Padding parameter to compensate for this kind of geometry. This feature allows you to modify the default size, increasing or decreasing the distance between the segment and others to the left, right, top and bottom sides. To see how it works, let's prevent some leaks and correct this style so that the pipes meets the collar correctly.
Exercise: Editing Segment Padding
- Open segment_padding.max and select rc_pipes.
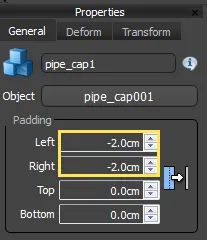
- Open the Style Editor and select the Segment node named
pipe_cap1. - Go to the Properties Panel and enter a value of -2cm for the Left and Right padding. The gap between the collar and the pipe will close up.
Generator Padding
Generators can also use padding values to offset the entire array. These are used to add offsets to the left. right. top and bottom if A2S generators, or the start and end if L1S generators. All calculations, such as evenly spacing, are based on the new lengths of the array after the offset has been applied. This is particularly useful for situations where you need multiple generators to jigsaw together, as we'll see in the following example of a window inside a surround.
Exercise: Editing Generator Padding
-
Open the file named generator_padding.max .
-
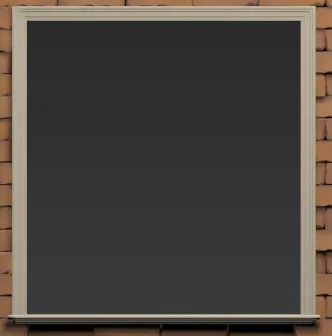
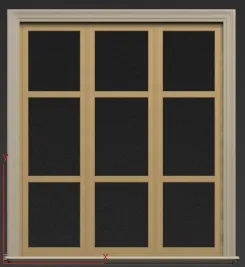
Select the object called rc_window. At the moment only the surround is displayed.
-
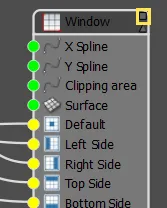
To see the window, open the style editor and find the generator called Window. this generator has been disabled. To enable it, click on the check-box found in generator's top right hand corner.
-
This style has one generator to create the surround and another for the window, Both generators use the same length values to determine their size on the X and Y Axes. Because of this the window on the frame overlap.
-
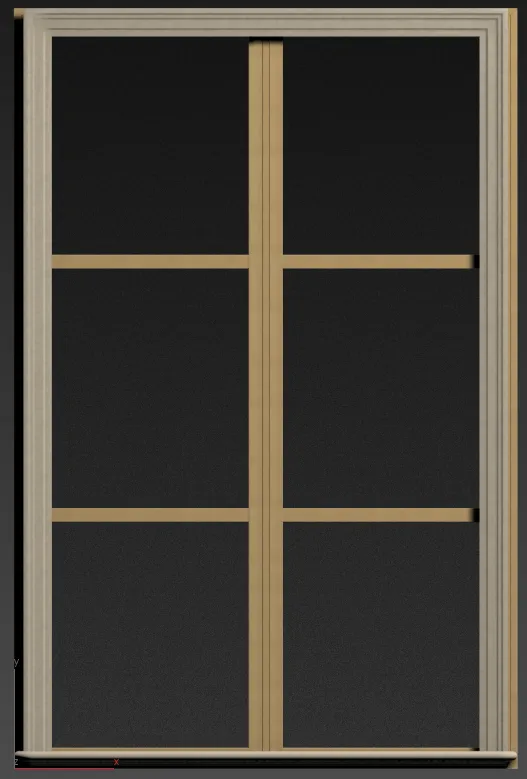
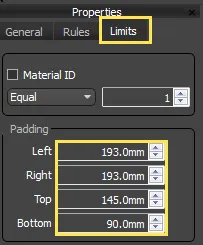
To prevent the window from overlapping the outer surround, padding is added to the top, bottom, left and right of the generator. To do this click on the Window generator and go to the Properties Panel. Select the Limits tab and enter a value of 193mm for the Left and Right padding, 145mm for the Top padding, and 90mm for the Bottom padding.
-
The window now sits neatly inside the surround. Close the Style Editor and adjust the size from the Parameters rollout, you'll notice that the offset remains constant irrespective of the size of the surround. Also of note, this style uses Evenly Count mode to ensure that the amount of vertical and horizontal elements remains the same as the window is resized.
Related Tutorials

This tutorial explains how to use the Random Transform feature to create books of different sizes and introduce some chaos to their distribution. In this tutorial you will also learn how to use the Randomise operator to randomly select geometry from a number of segments.
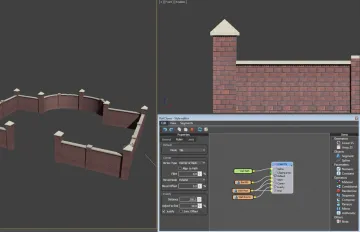
The Masonry Wall tutorial makes good use of padding values to compensate for the overhang of the cap to the top of the pillars. This tutorial is intended for new users of RailClone, and provides a thorough introduction to some of the most commonly used features. By completing this exercise you will be able to use the built in library, understand the style editor, and easily create new styles.
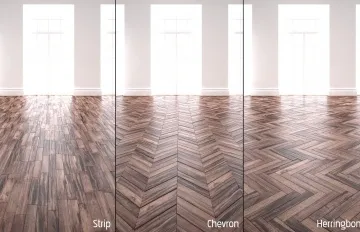
This tutorial explains how to model parquet floors from individual planks. The 2D array generator is used throughout and provides an excellent way to create a wide variety of floor patterns using only a single enclosed spline to define the boundary. The planks are made to fit together correctly and make 3 different patterns by editing their padding values. Also of note is the Floor library that ships with RailClone. You can study these styles to learn more ways to create floors.

Stadium Tutorial Part 2,3, and 4
The stadium tutorial uses a number of L1S arrays to create advertising hoarding, seating and the crowd. Padding, alignment and transform randomisation is used throughout to create the seats, crowds, and flags.

Parts 2 and 3 of this tutorial use Padding values extensively to ensure that the segments fit together correctly.
For more information please see the Segments, 2D arrays - Generator A2S and 1D arrays - Generator L1S sections of the online documentation.